Step-by-step guide to installing IRDM PRO SLIM drive in PlayStation™ 5 console
28 June 2023Latest modification: 29 June 2023

With the release of the latest PlayStation™ console, the manufacturer has enabled users to expand the device’s memory by mounting an additional M.2 SSD under the console’s chassis.
In this tutorial, we’ll walk you through the process of installing an IRDM PRO SLIM drive in your PlayStation™ 5 console to keep it running at peak performance with additional space for game storage.
Check compatibility
Before you buy an SSD, make sure that the drive is fully compatible with your PlayStation™ 5 console. The manufacturer has specified the size, interface and specification requirements of the M.2 SSD.
Check that the drive you intend to buy will be suitable for the console and that it will meet all the requirements set by the console to avoid incompatibility.
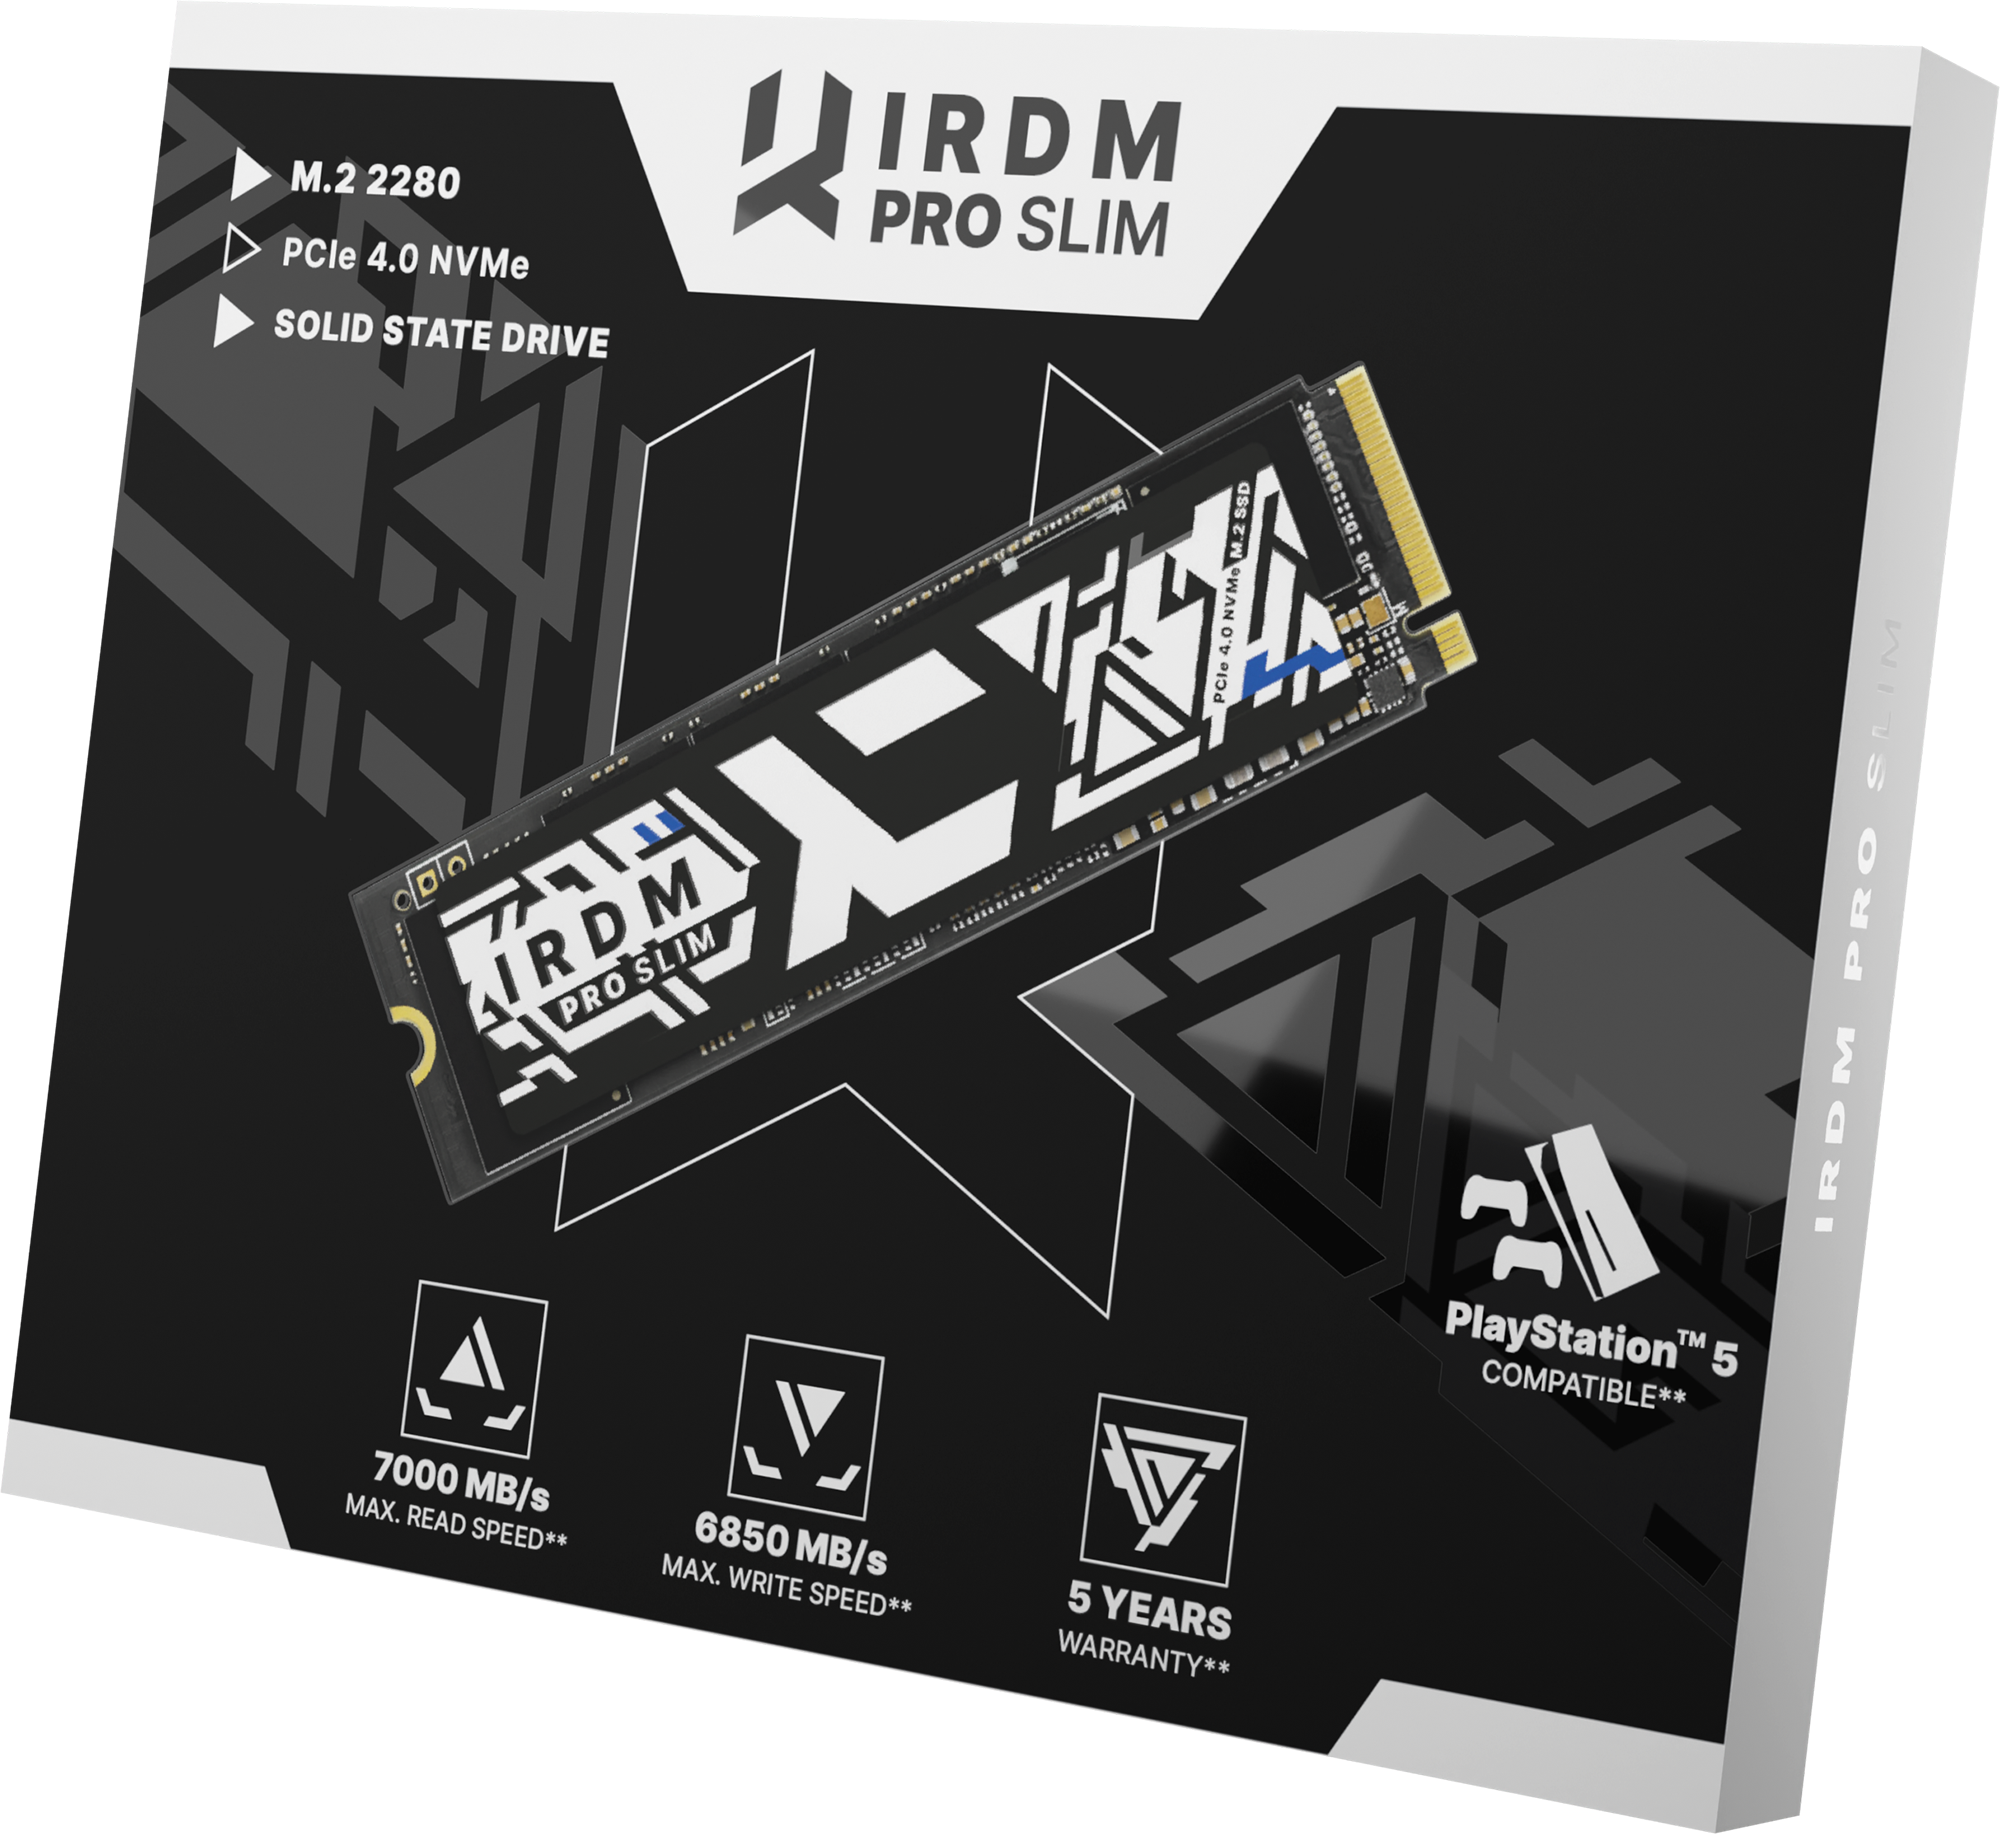
By choosing the IRDM PRO SLIM, you can be sure that the drive will meet all the requirements of PlayStation™ 5 and be fully compatible with it.
Gather the necessary tools
Before installing the IRDM PRO SLIM drive in your PlayStation™ 5 console, prepare the following tools:
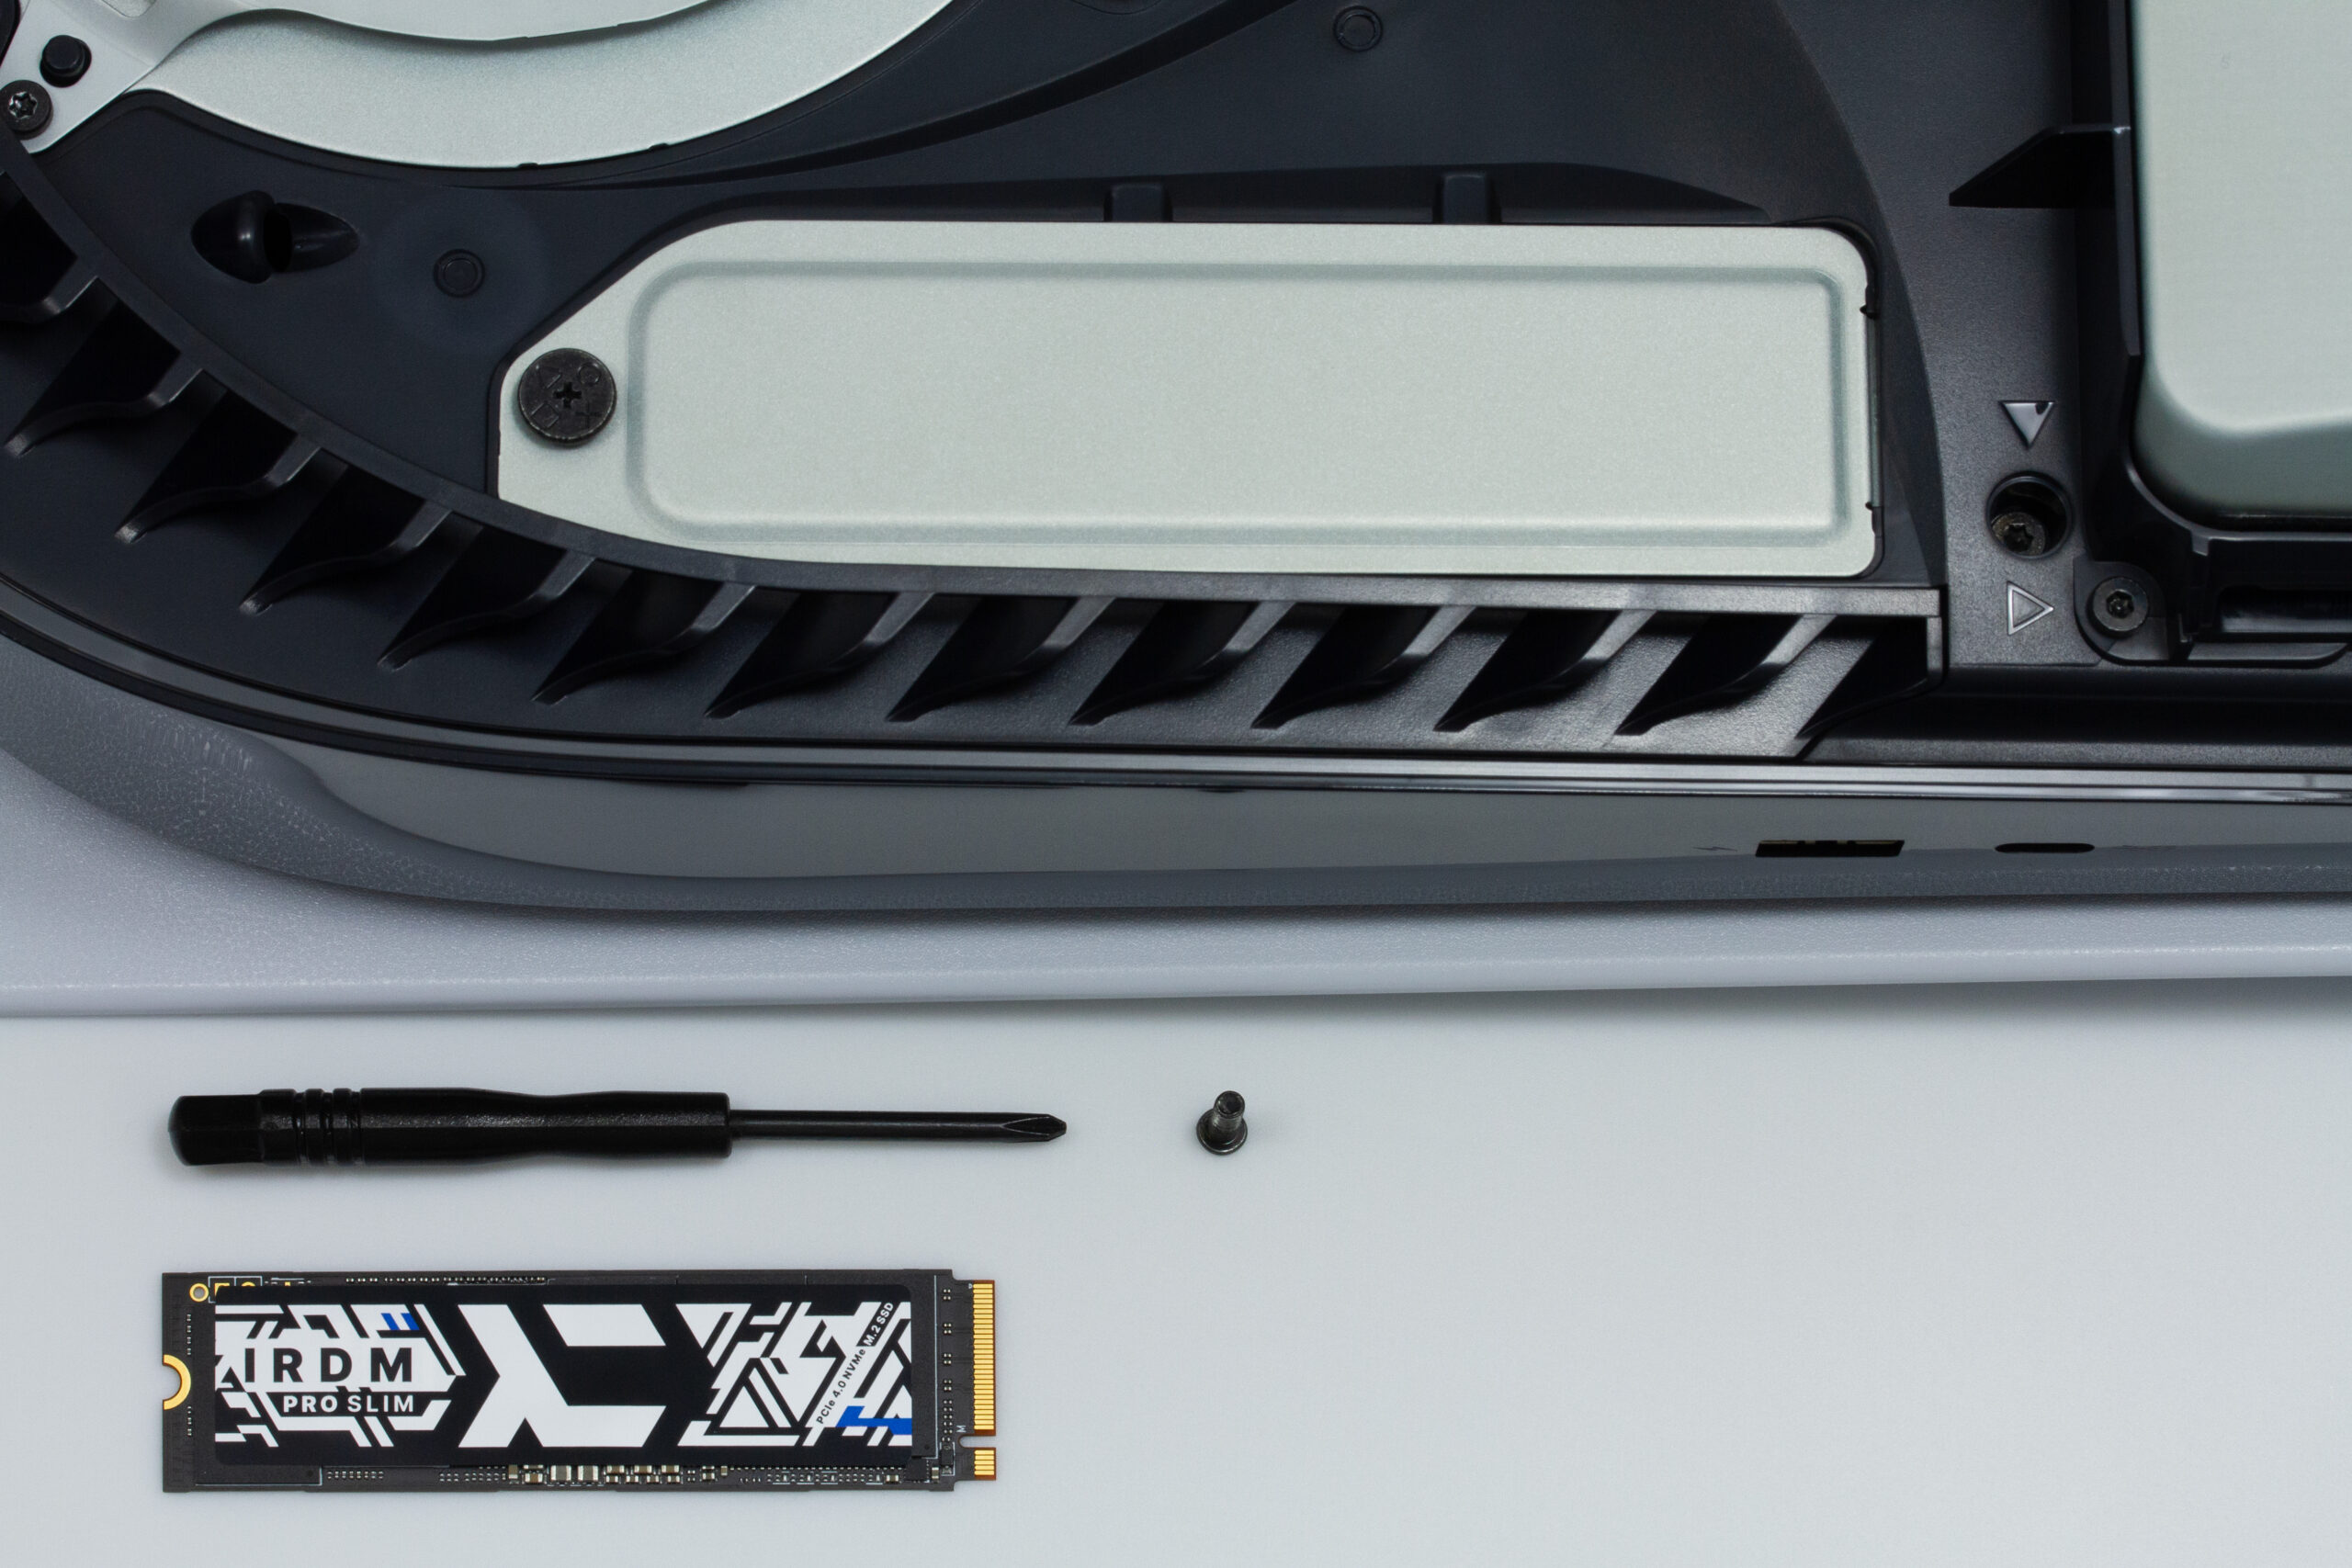
- Phillips screwdriver – which will be needed to remove the screw securing the M.2 slot protection cap in the console, and will be used to properly install the SSD in the M.2 slot,
- Compatible SSD drive. Be sure to choose a drive that complies with the requirements specified by the manufacturer. The M.2 SSD should have a 2280 format, support read and write speeds of more than 5500 MB/s, and it is worth paying attention to the appropriate capacity of the additional drive – drives in the range of 1 to 4 TB of capacity are recommended.
- Soft pad – will allow you to protect the console housing during assembly and disassembly from scratches, in addition, it will ensure that the console does not change its position during the work.
To make it easier for users to choose the right drive, manufacturers often indicate compatibility with the PlayStation™ 5 console on the packaging or on the media itself.
The process of installing a disk in a PlayStation™ 5 console
- Start by properly shutting down the console and disconnecting it from the power supply. Avoid abruptly disconnecting the power supply, as this may adversely affect the subsequent operation of the console system, or may directly lead to system, or hardware damage.
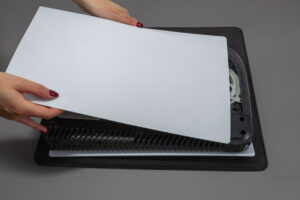
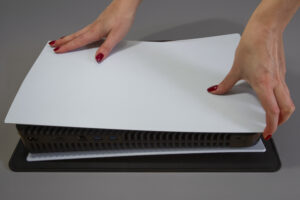
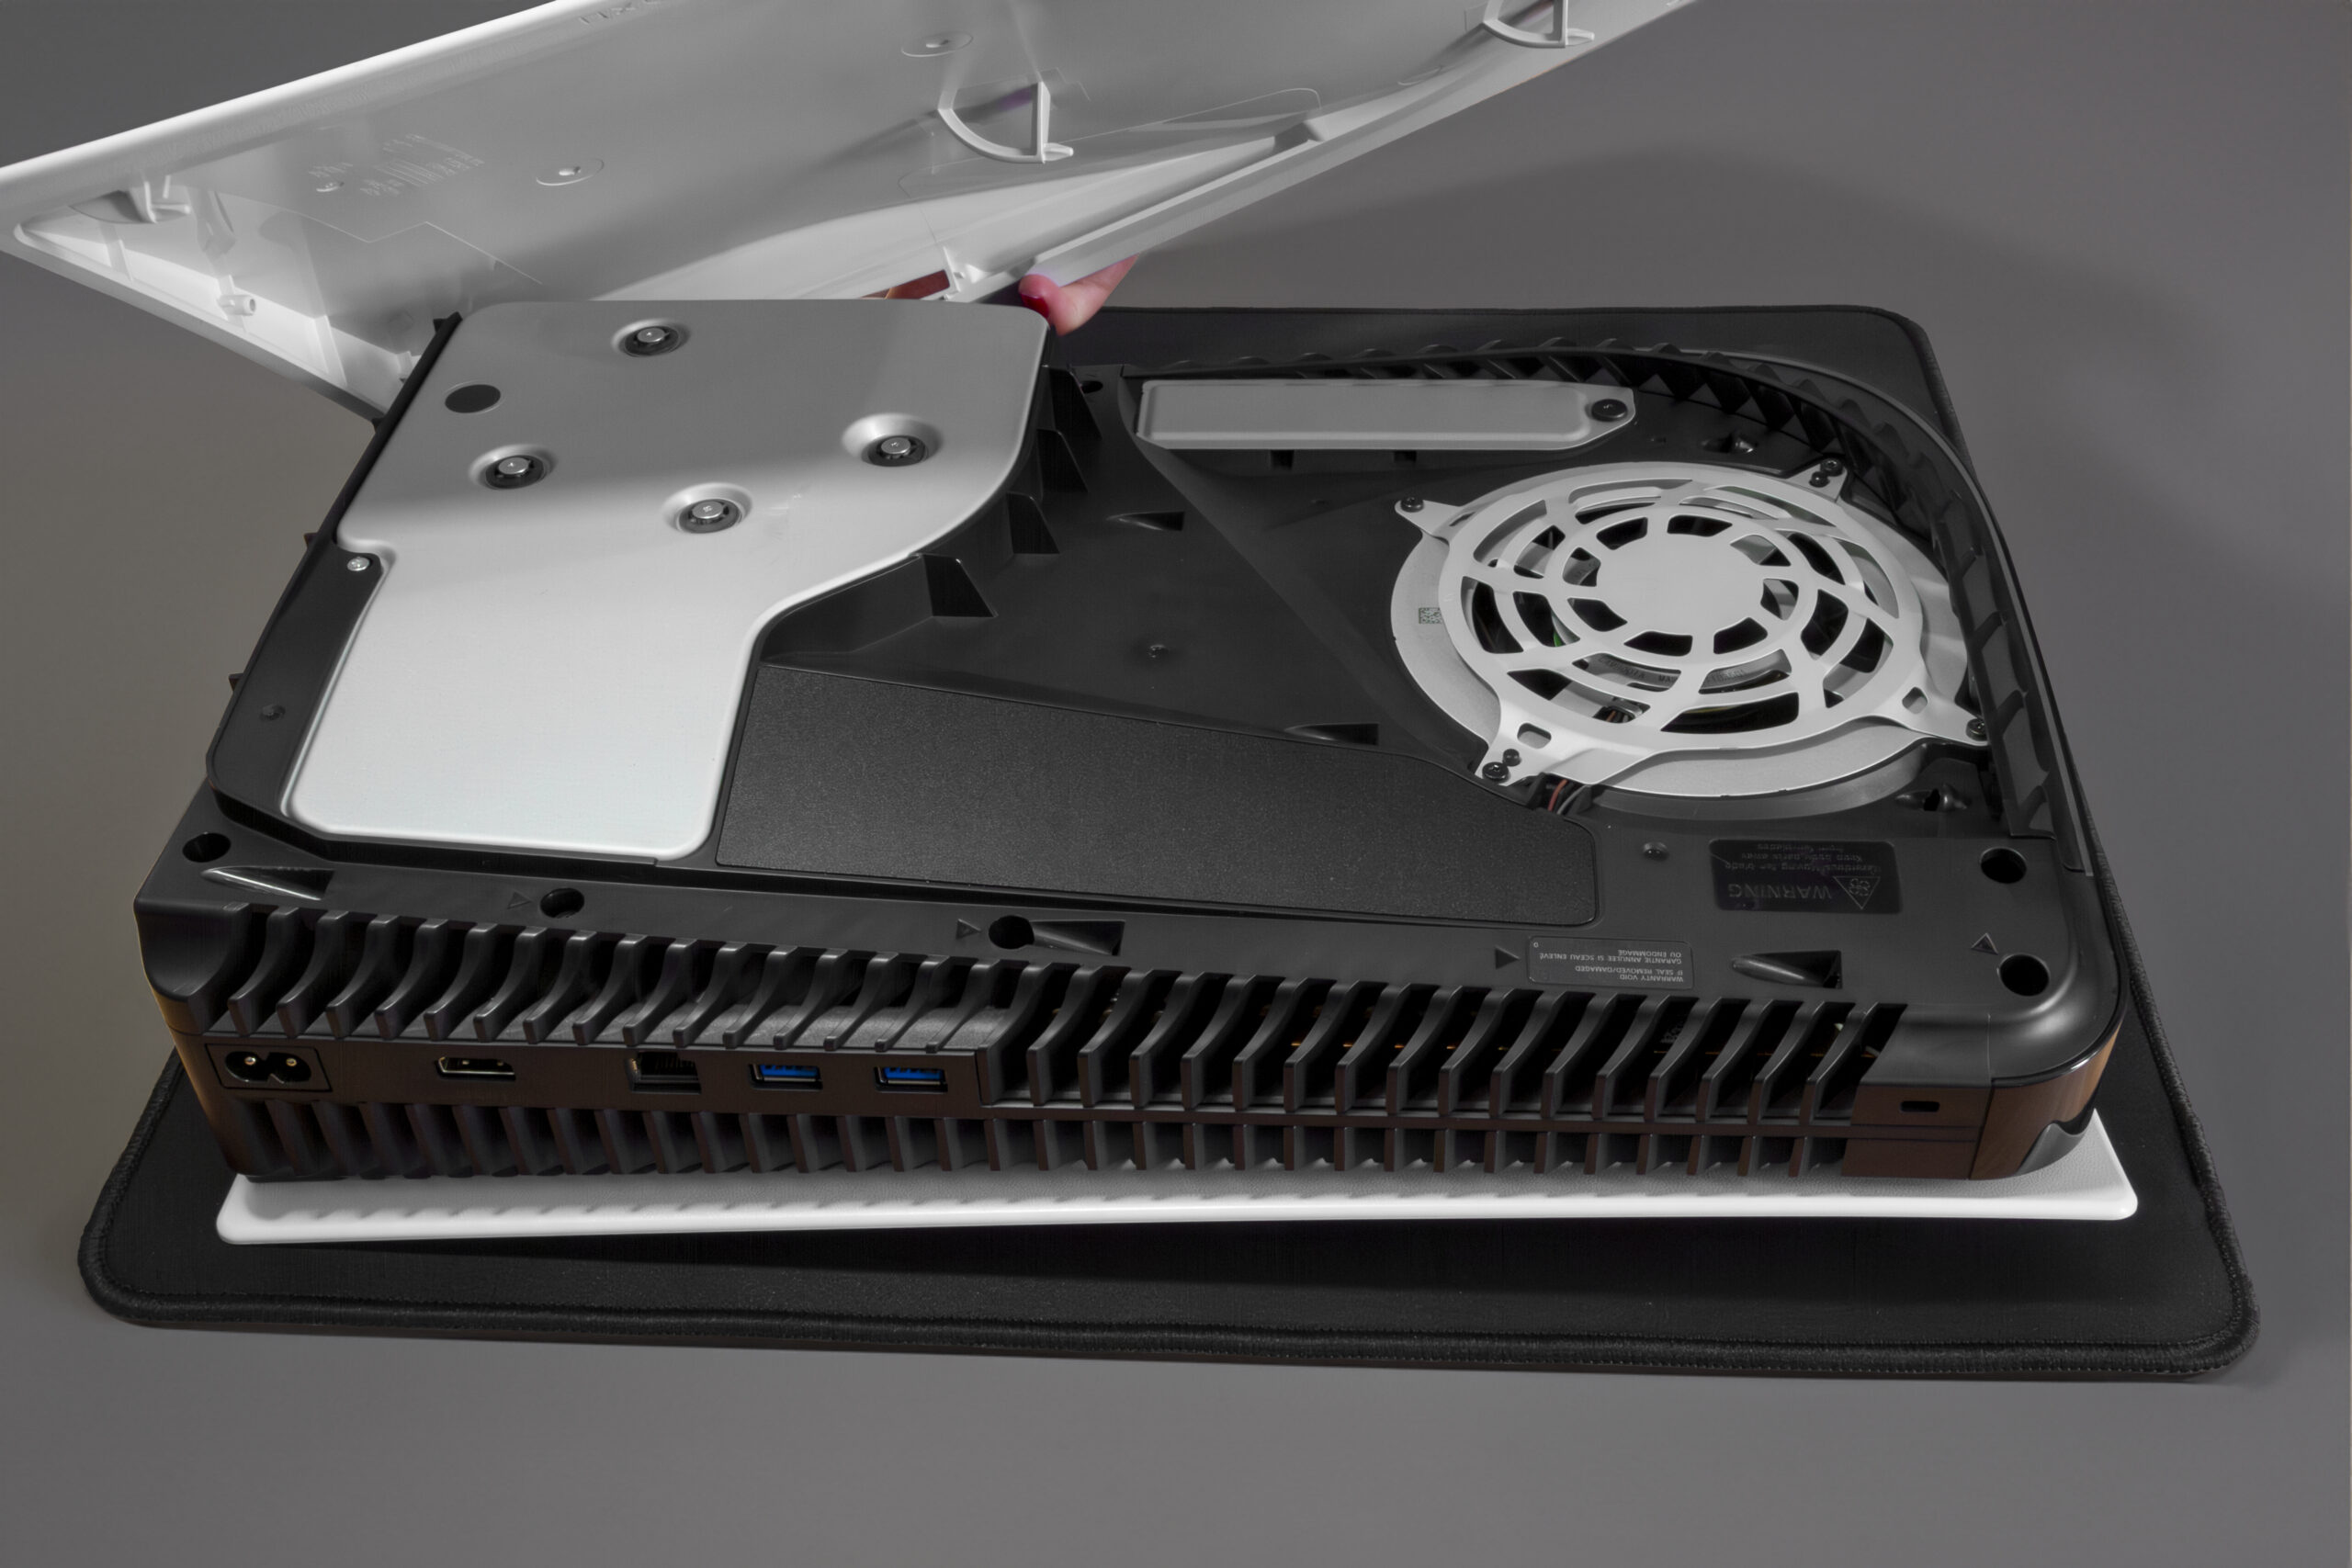
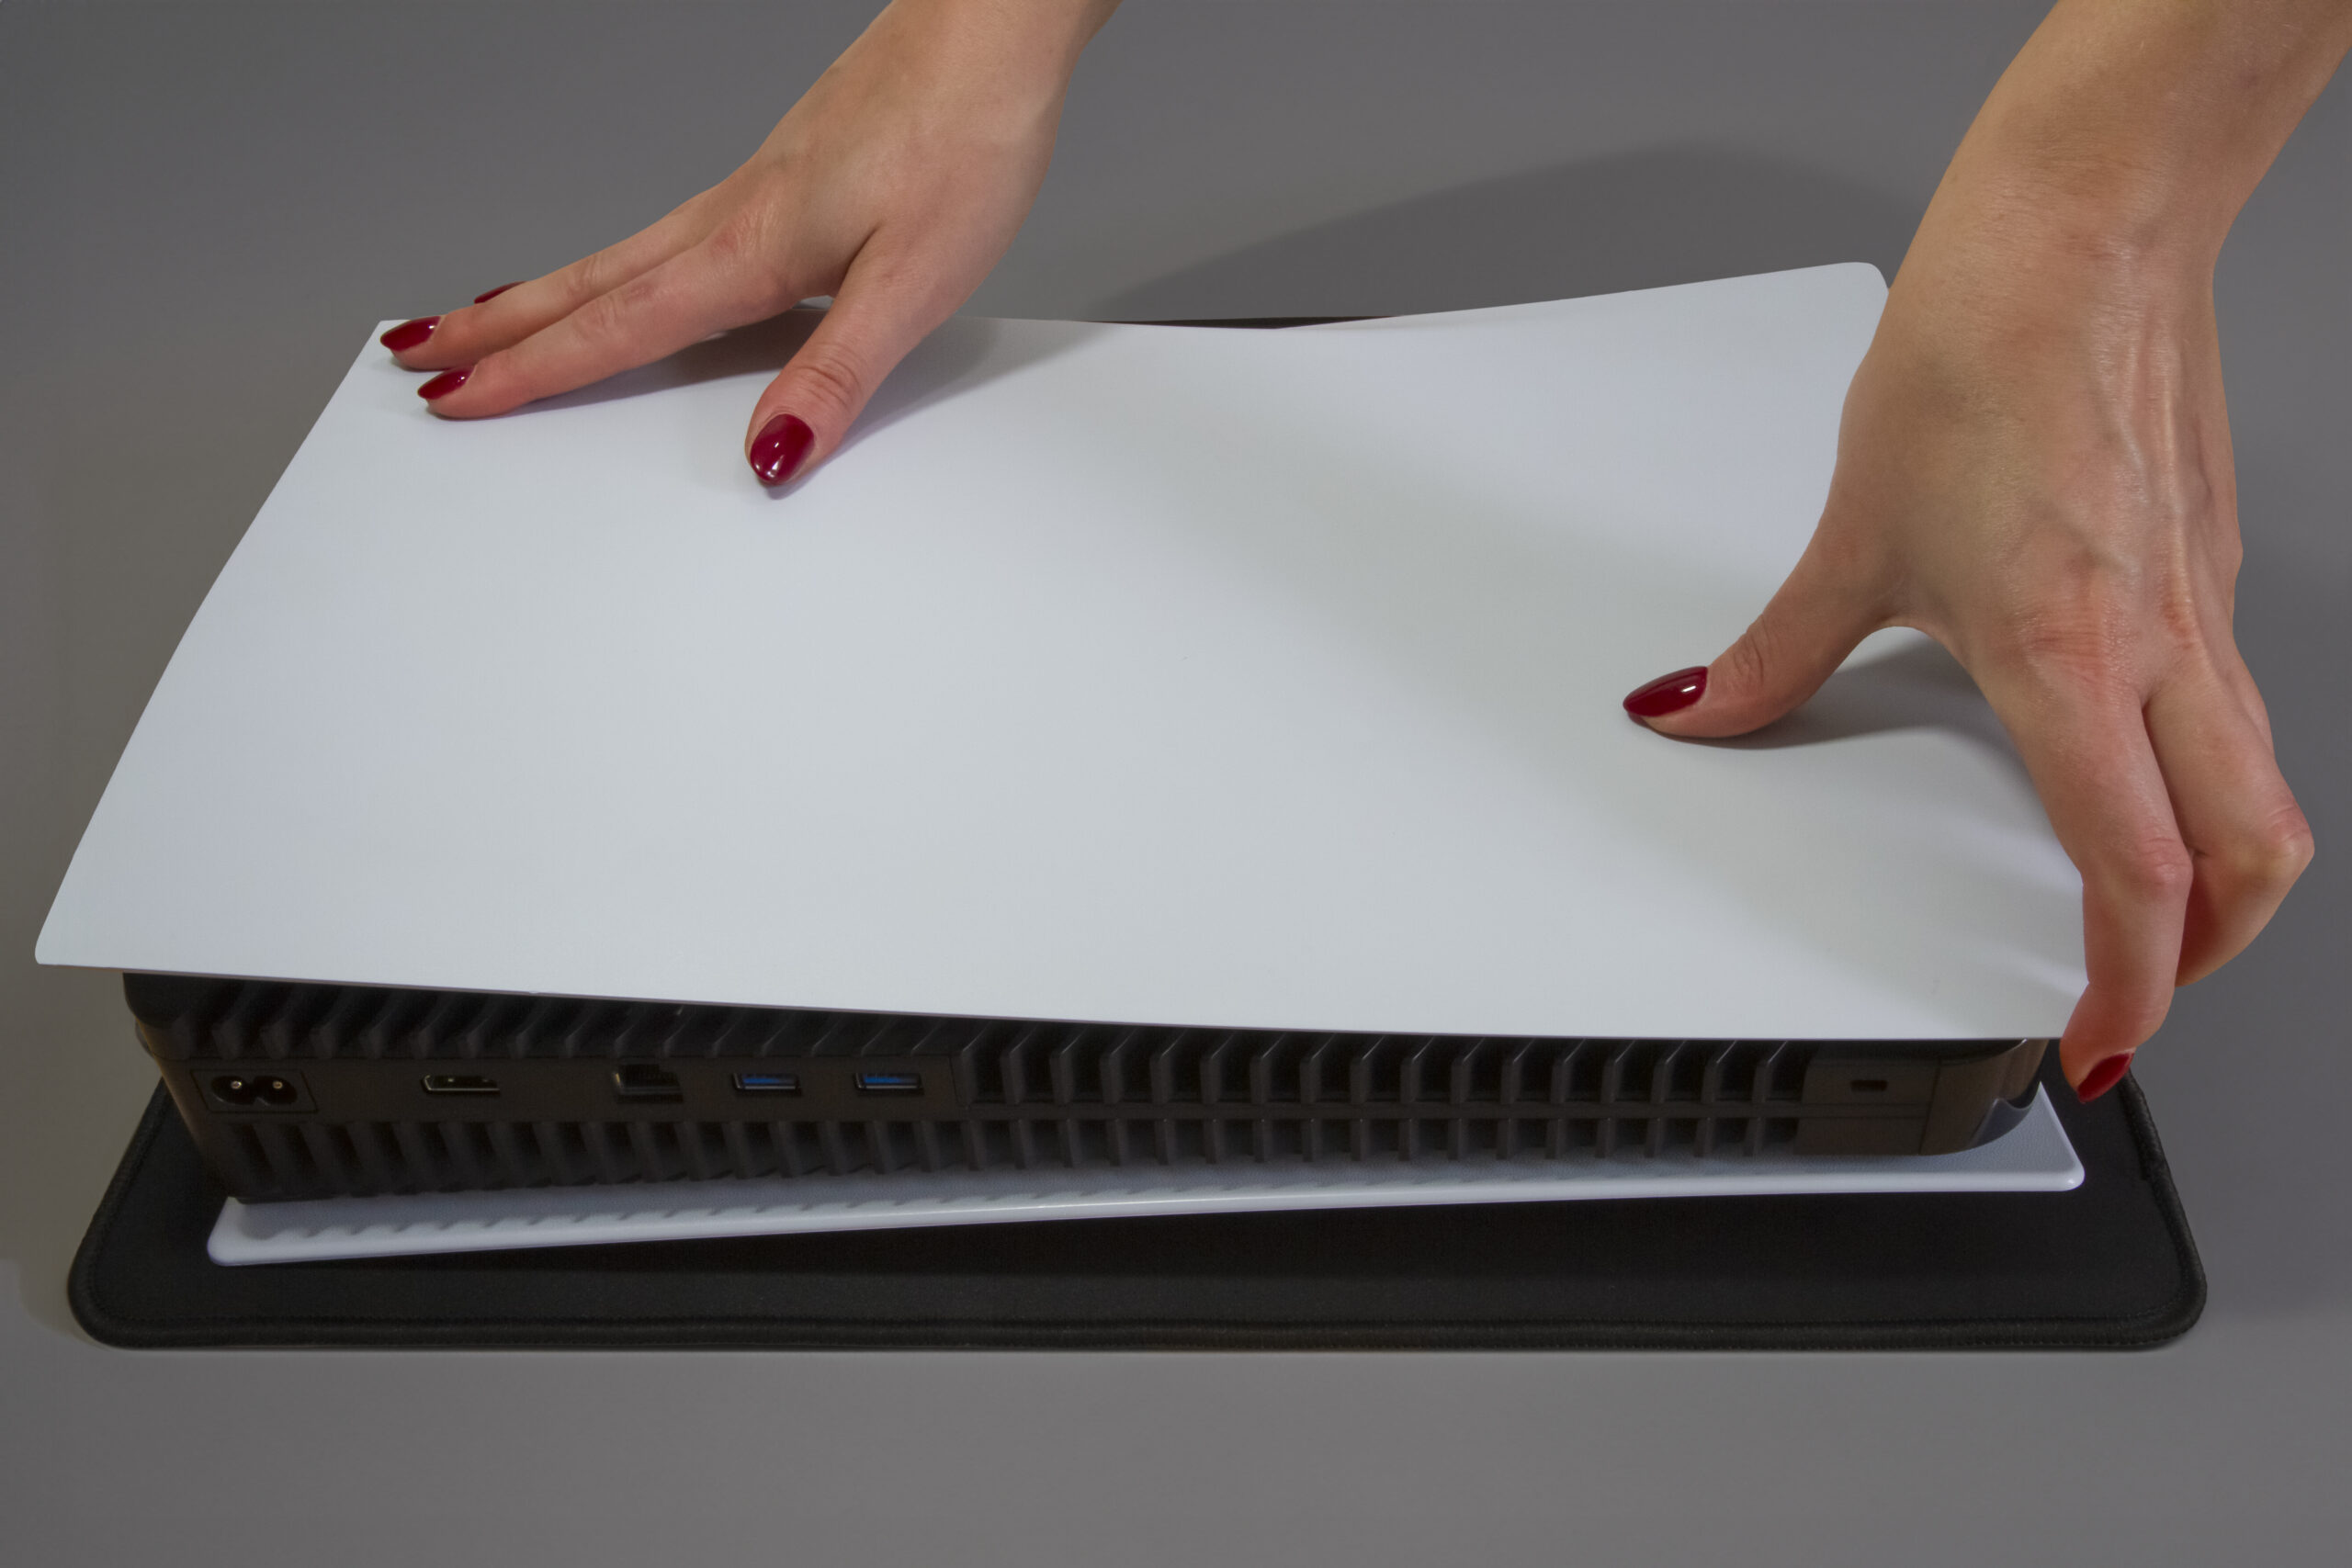
- Lay the console on its right side, looking from the back of the console, and open the side panel. To do this, you need to:
- Put your left hand on the upper left corner and your right hand on the lower right corner and press on opposite corners of the case at the same time.

- Sensing the moment, you need to gently move the cover to the left.

- Then simply lift the cover and put it back in a safe place.
- Put your left hand on the upper left corner and your right hand on the lower right corner and press on opposite corners of the case at the same time.
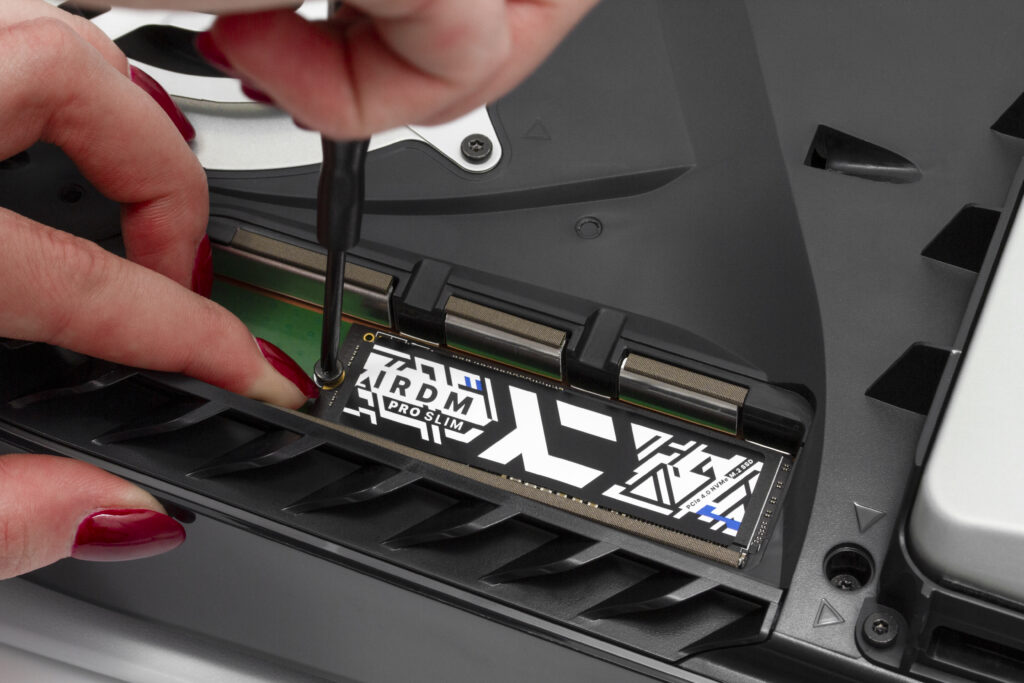
- Unscrew the cap that secures the M.2 connector on the PlayStation™ 5 console.

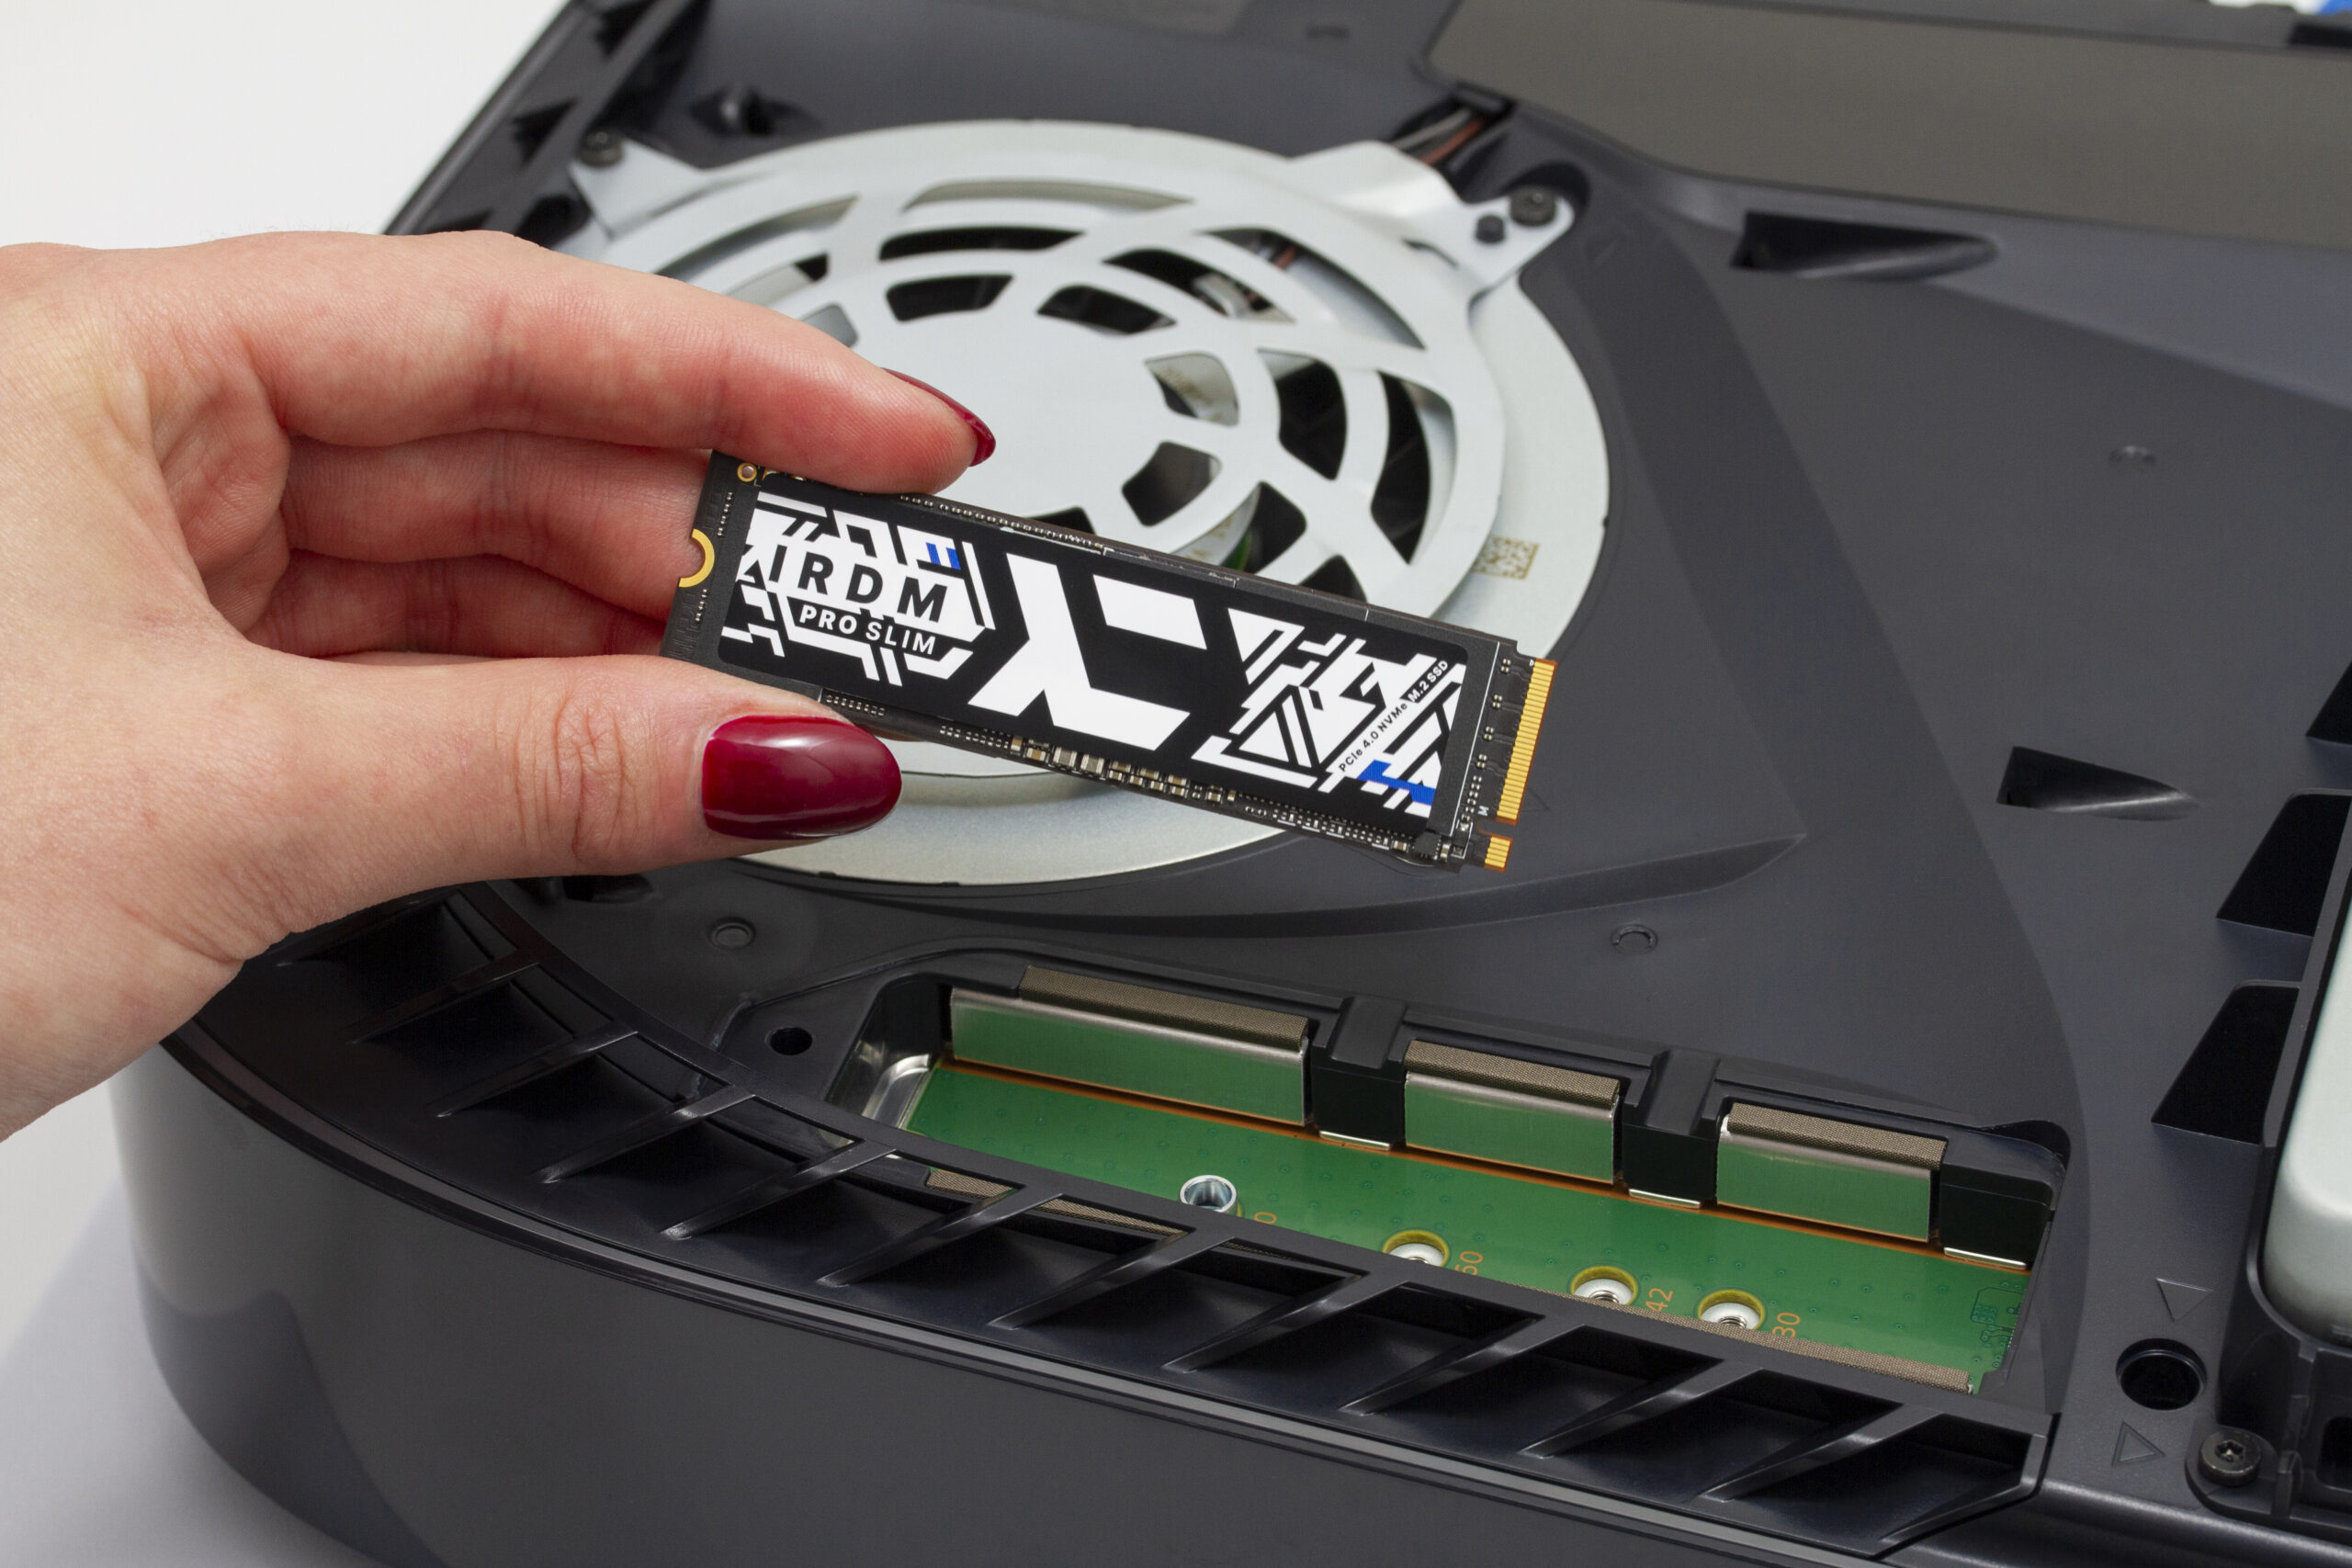
- Check whether the screw present in the console, which is supposed to allow you to screw the disk later, is at the right distance. If it is not, then change its position depending on the disk you plan to mount. In the case of the IRDM PRO SLIM, the screw supporting the disk should be at a distance of 80 mm from the M.2 connector.

- Insert the SSD at a 45° angle into the M.2 slot. Be careful, because the M.2 connector is asymmetrical and only allows the M.2 drive to be mounted on one side – make sure you try to mount the drive correctly so you don’t damage the SSD or the connector in the console.
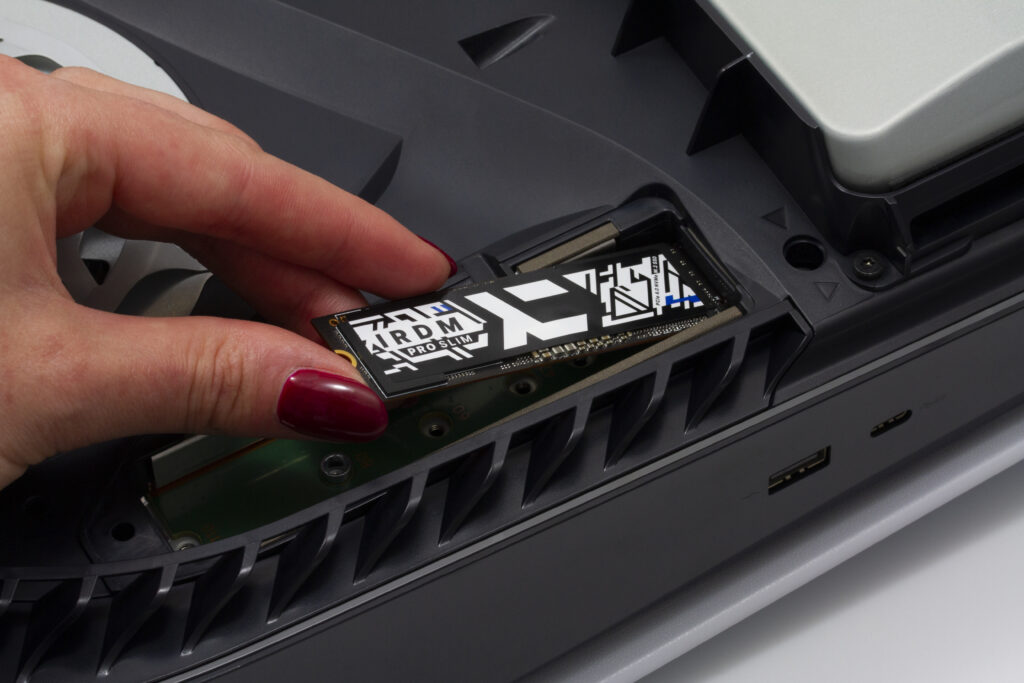
- Press the disk against the previously prepared screw, which acts as a stand, and fasten it with the mounting screw.
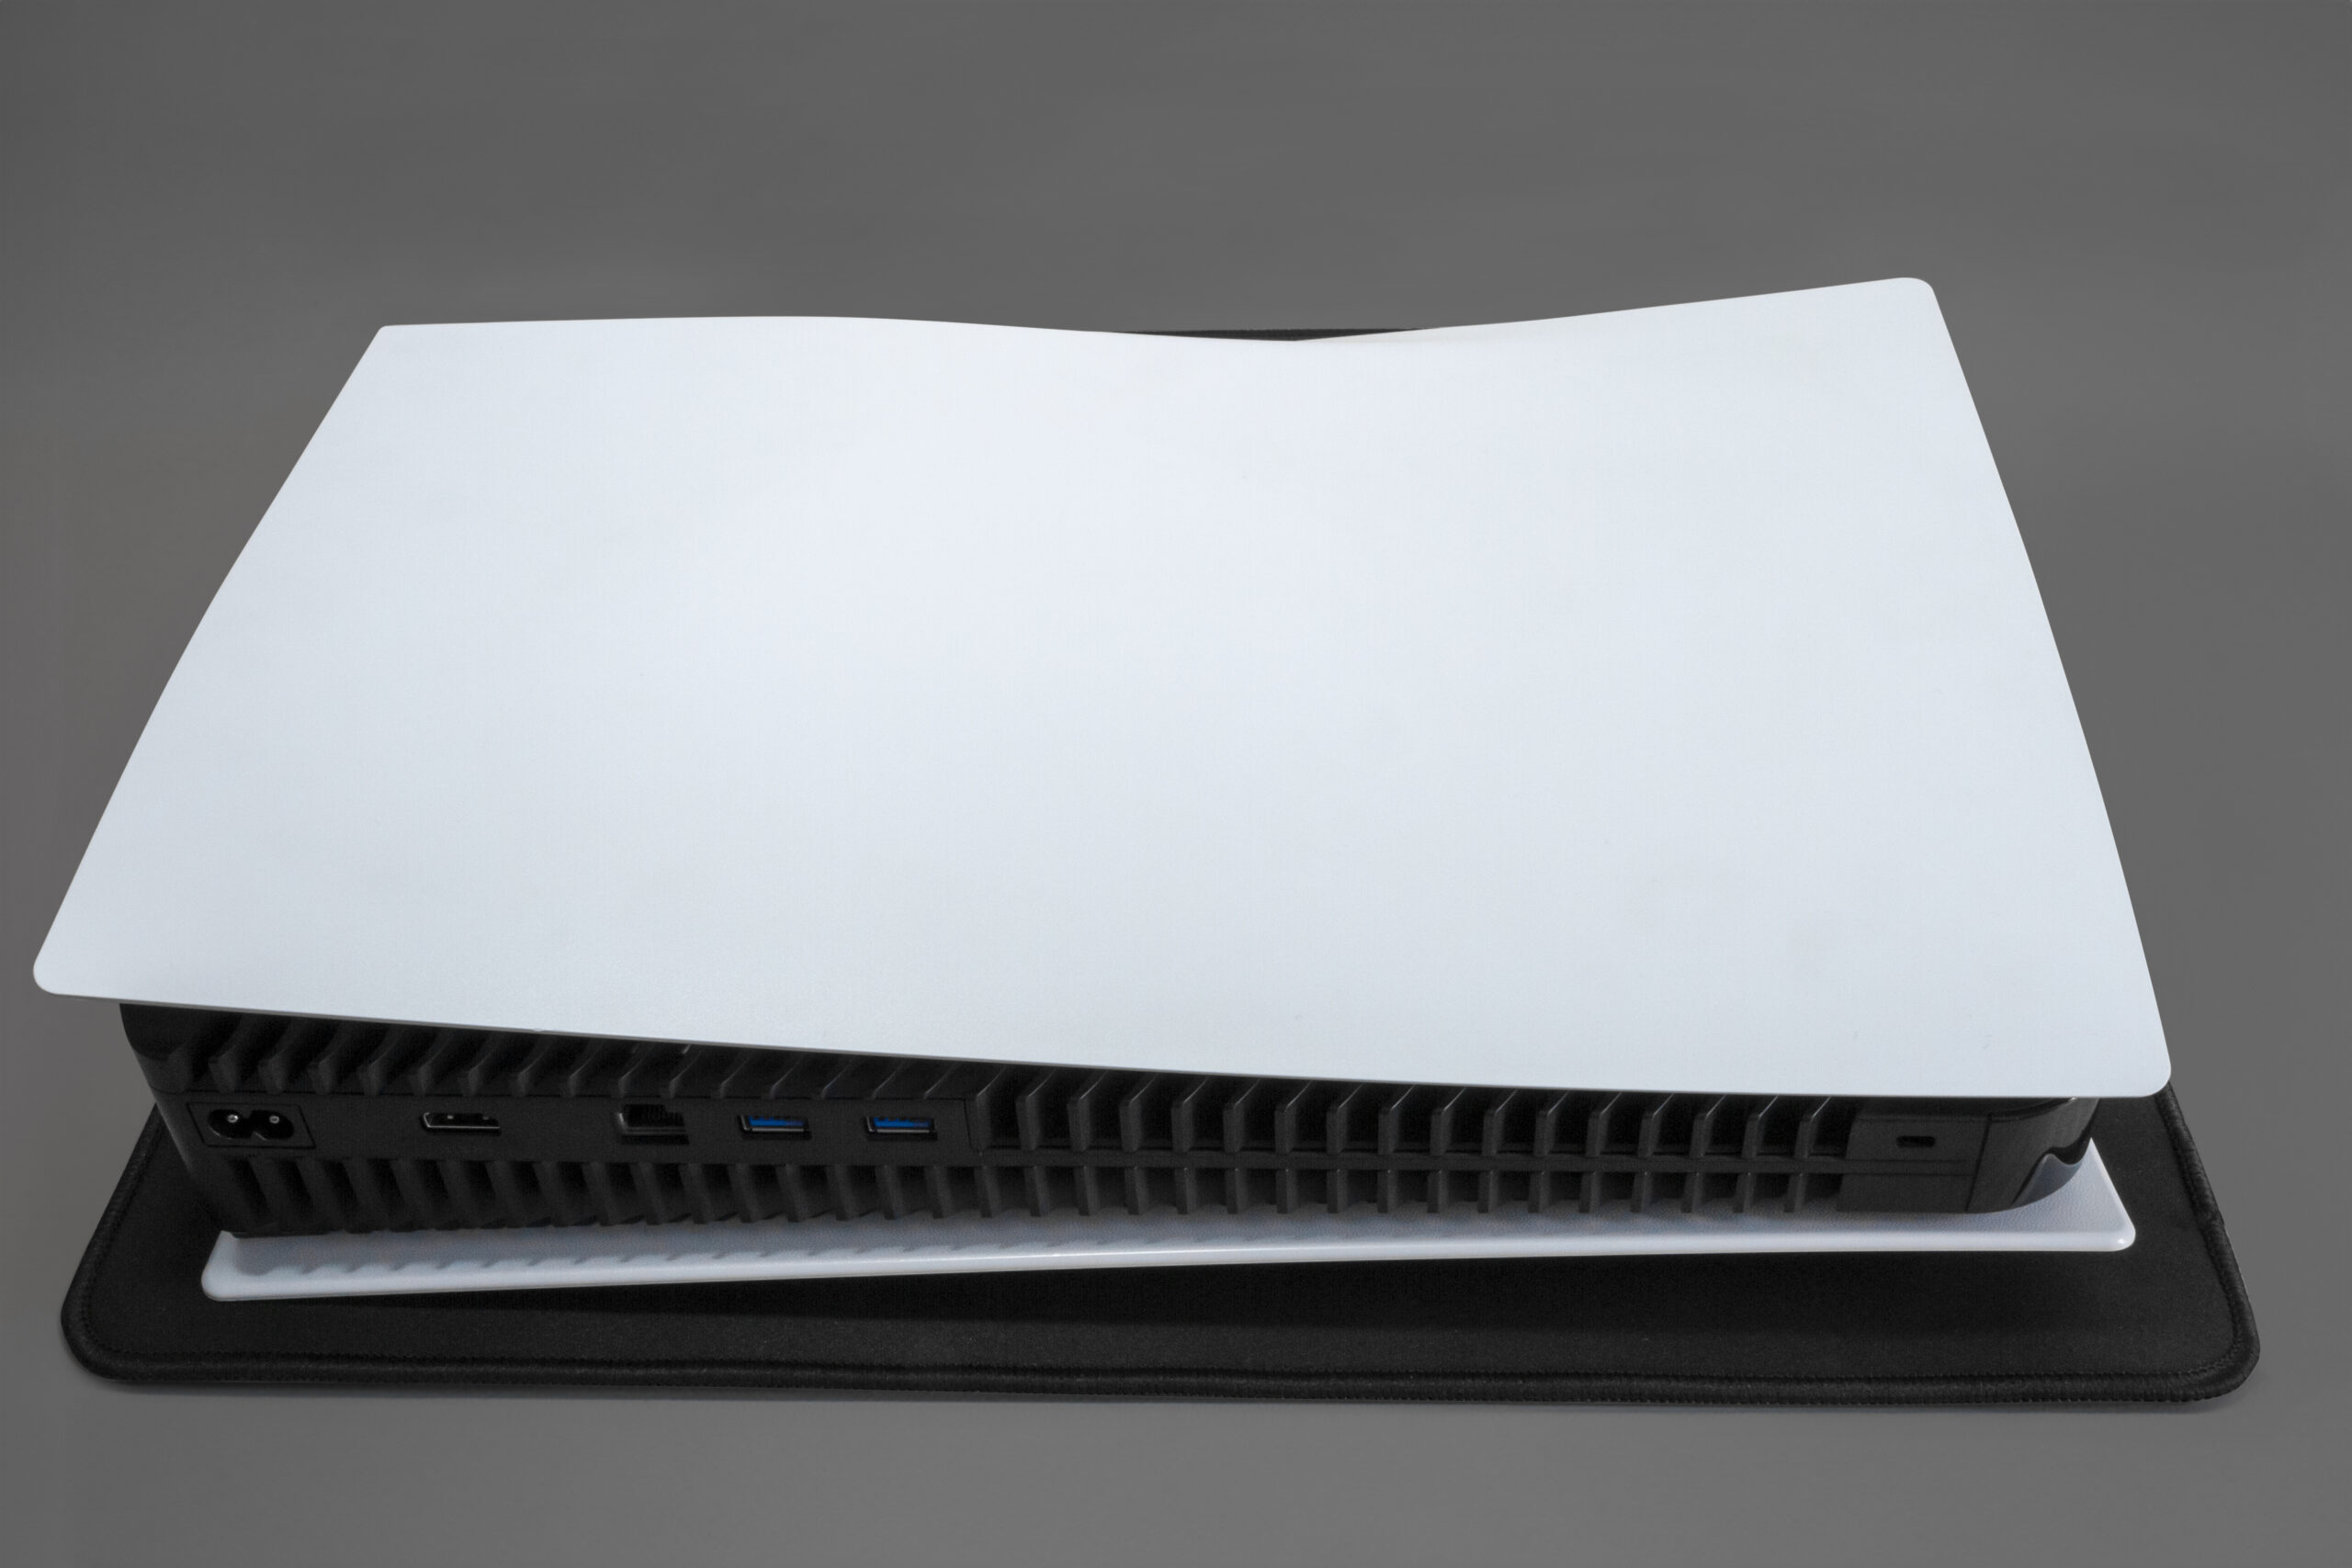
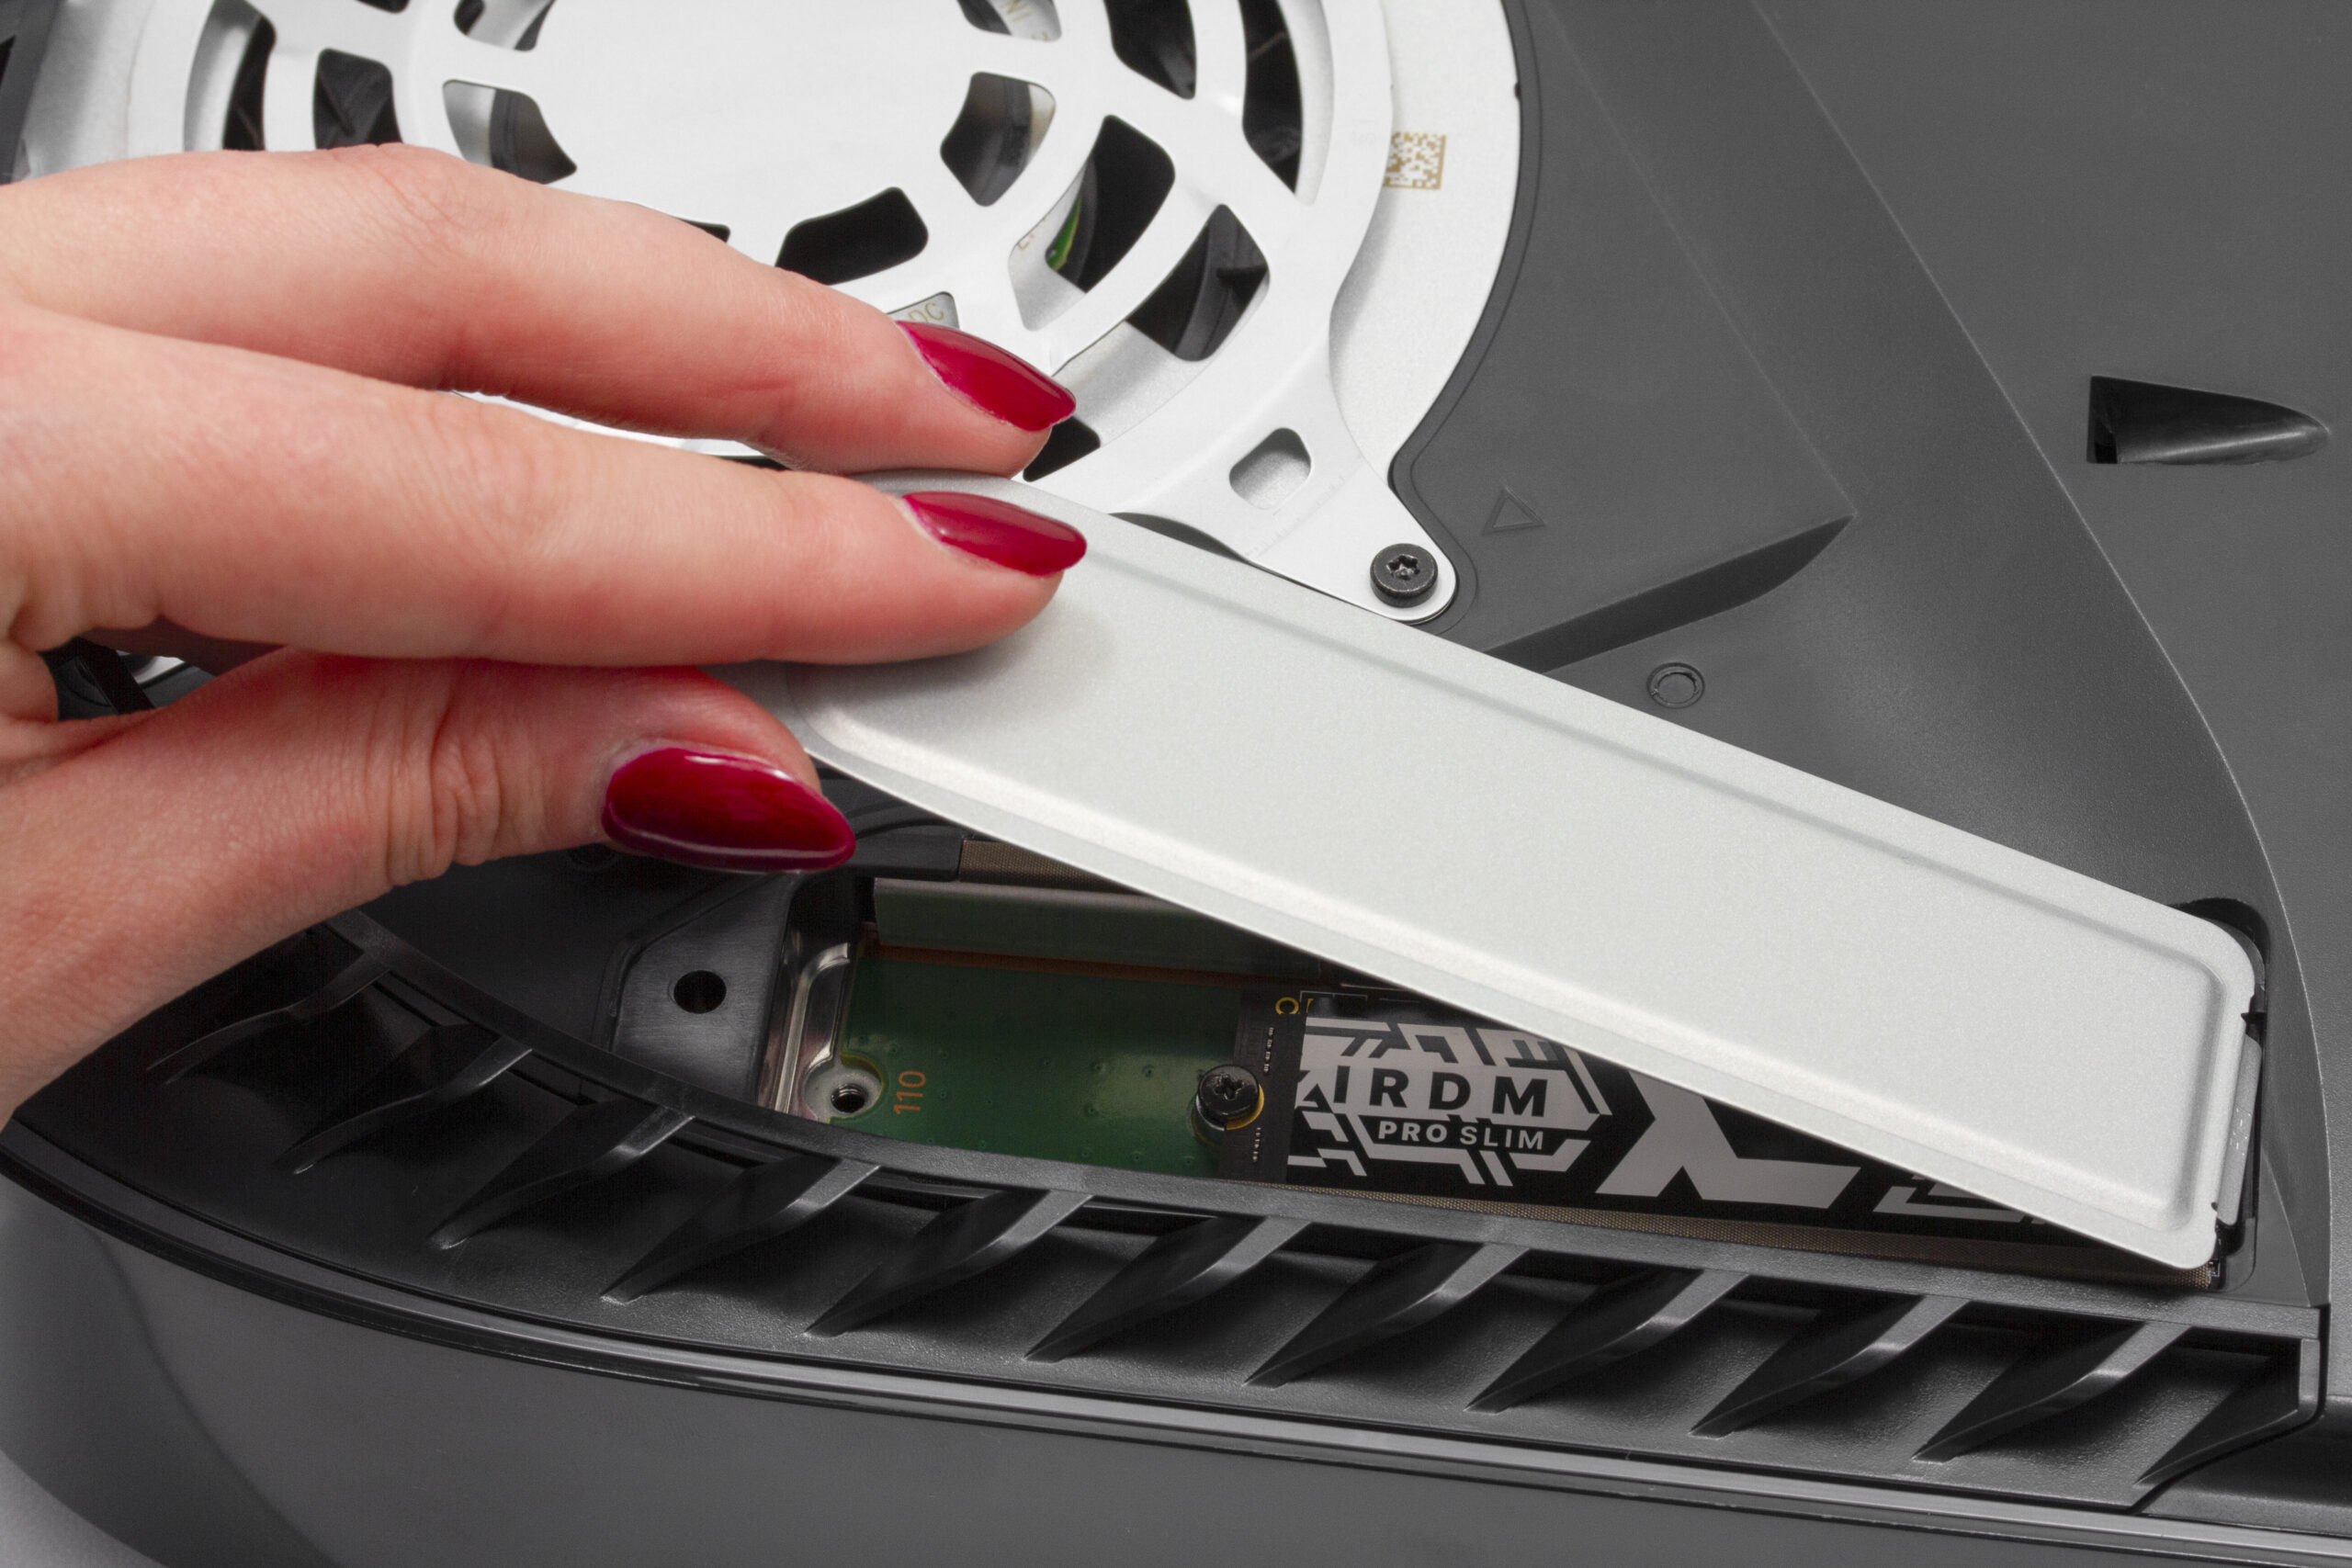
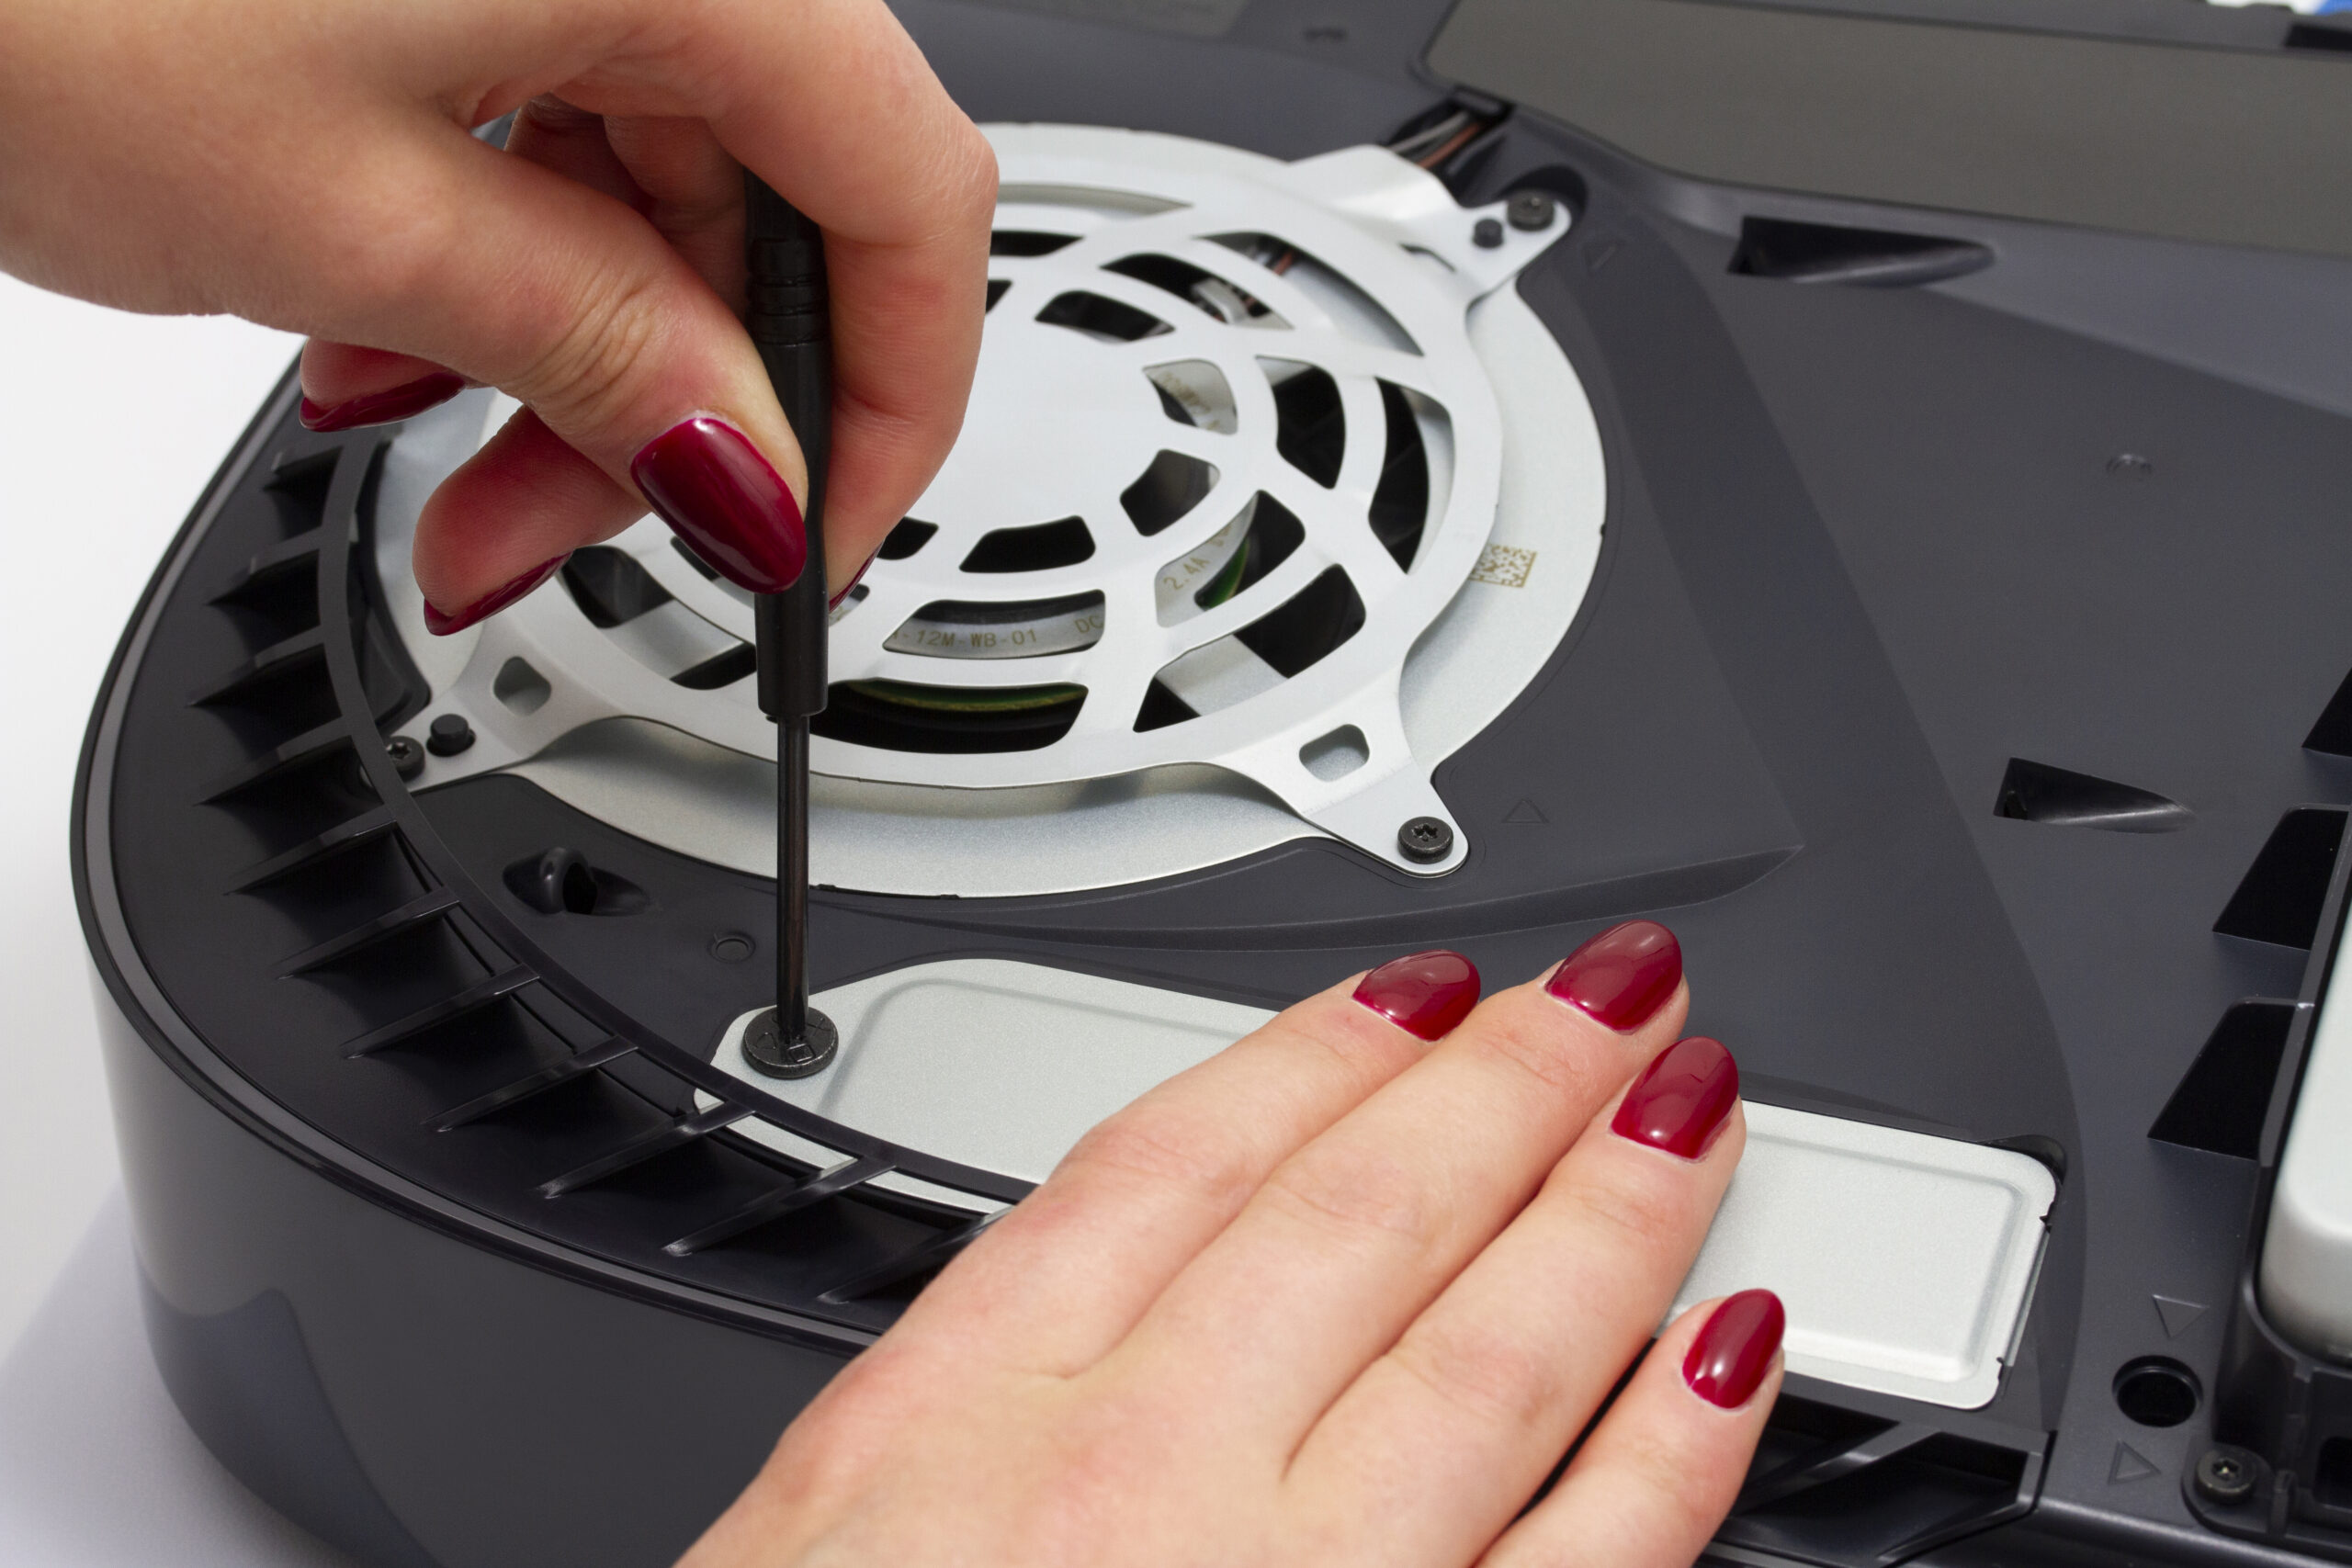
- Reinstall and screw the cap securing the M.2 connector on the console. It is very important because it increases the efficiency of airflow through the special air channels in the PlayStation™ 5 console.
-
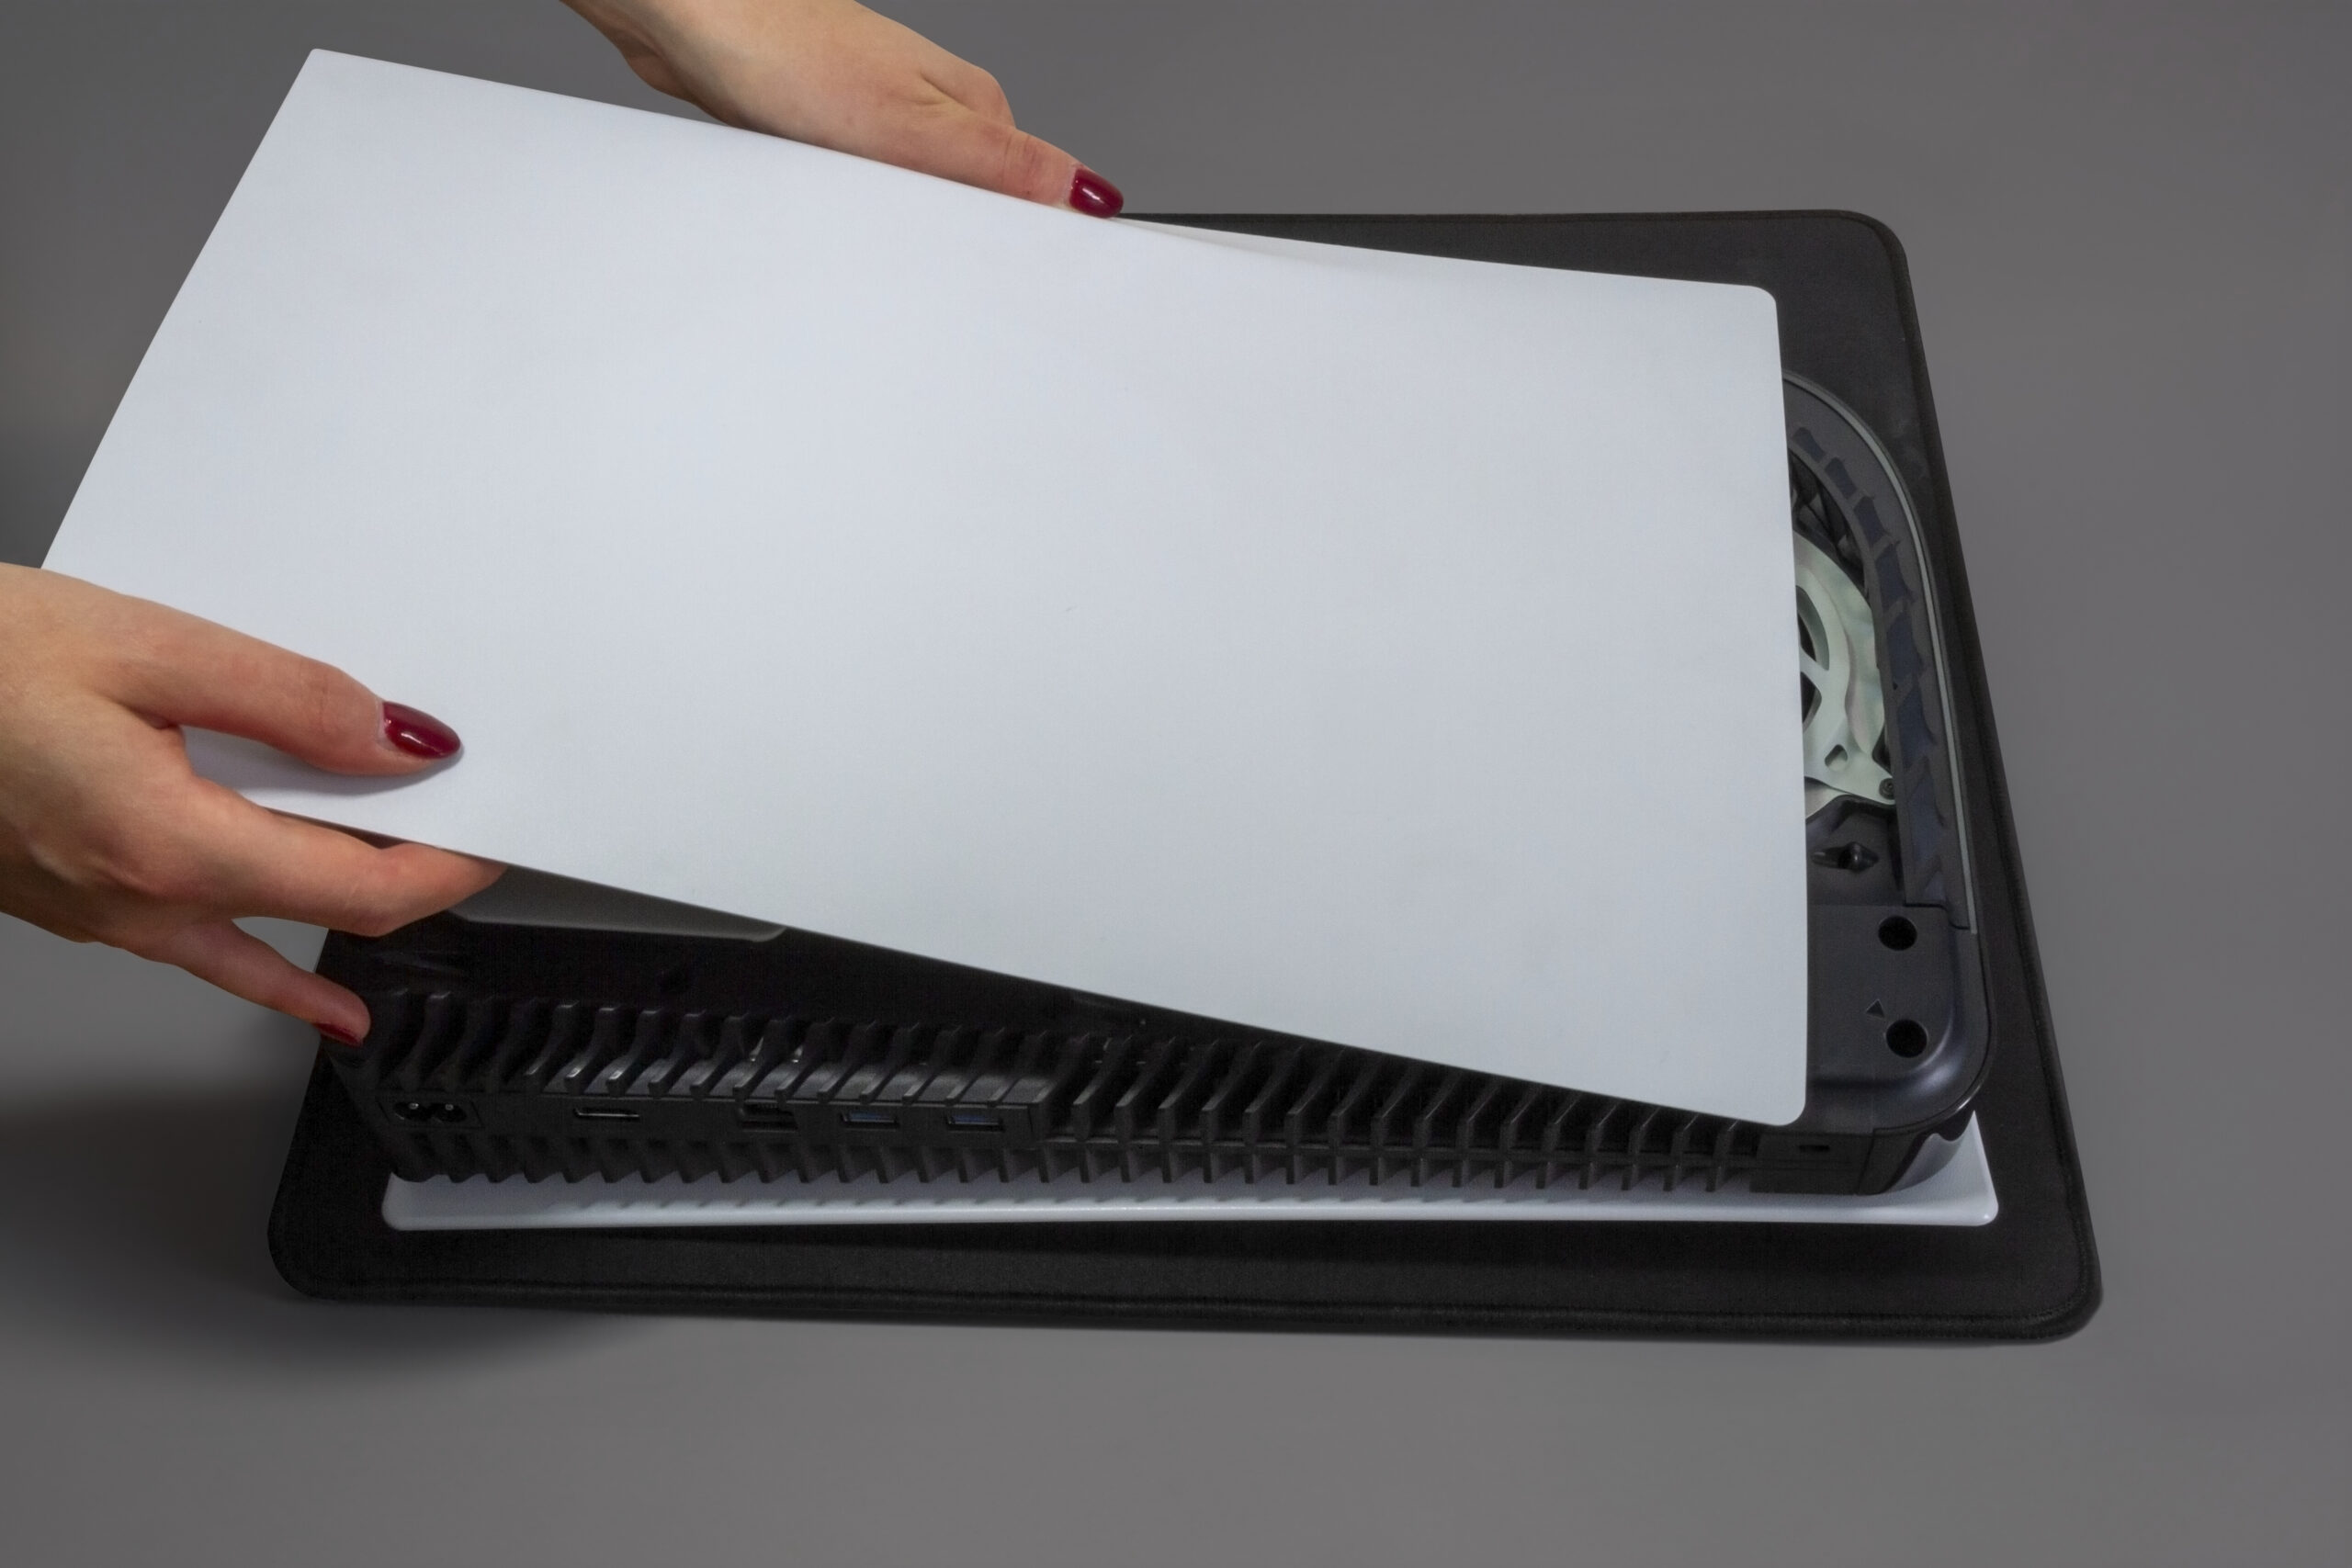
- Install the console housing component in the reverse way to its removal:
- Put the cover on the dedicated indentations.

- Slide the cover into position and press down until you hear the characteristic *click*.
- Put the cover on the dedicated indentations.


Thus prepared, the console is already armed with additional memory, but is not yet fully operational. Ahead of you is the stage of the first configuration of the newly installed drive.
SSD configuration
After the SSD is correctly installed in the PlayStation™ 5 console, it is necessary to perform the first configuration of the new SSD. At this stage, the data of the console itself will not be erased, however, if the installed drive was not new and has already stored data, all data of the additional drive will be erased during the first configuration of the console!
Start by reconnecting the console to the power supply and boot it up in the standard way.
If the right drive has been selected, the PlayStation™ 5 console should recognize it without any problems and immediately after booting up, it will initiate by itself the necessary configuration procedures that will prepare the drive for operation. All you have to do is click “Format M.2 SSD device“.

Then wait until the configuration of the new disk and console is complete.

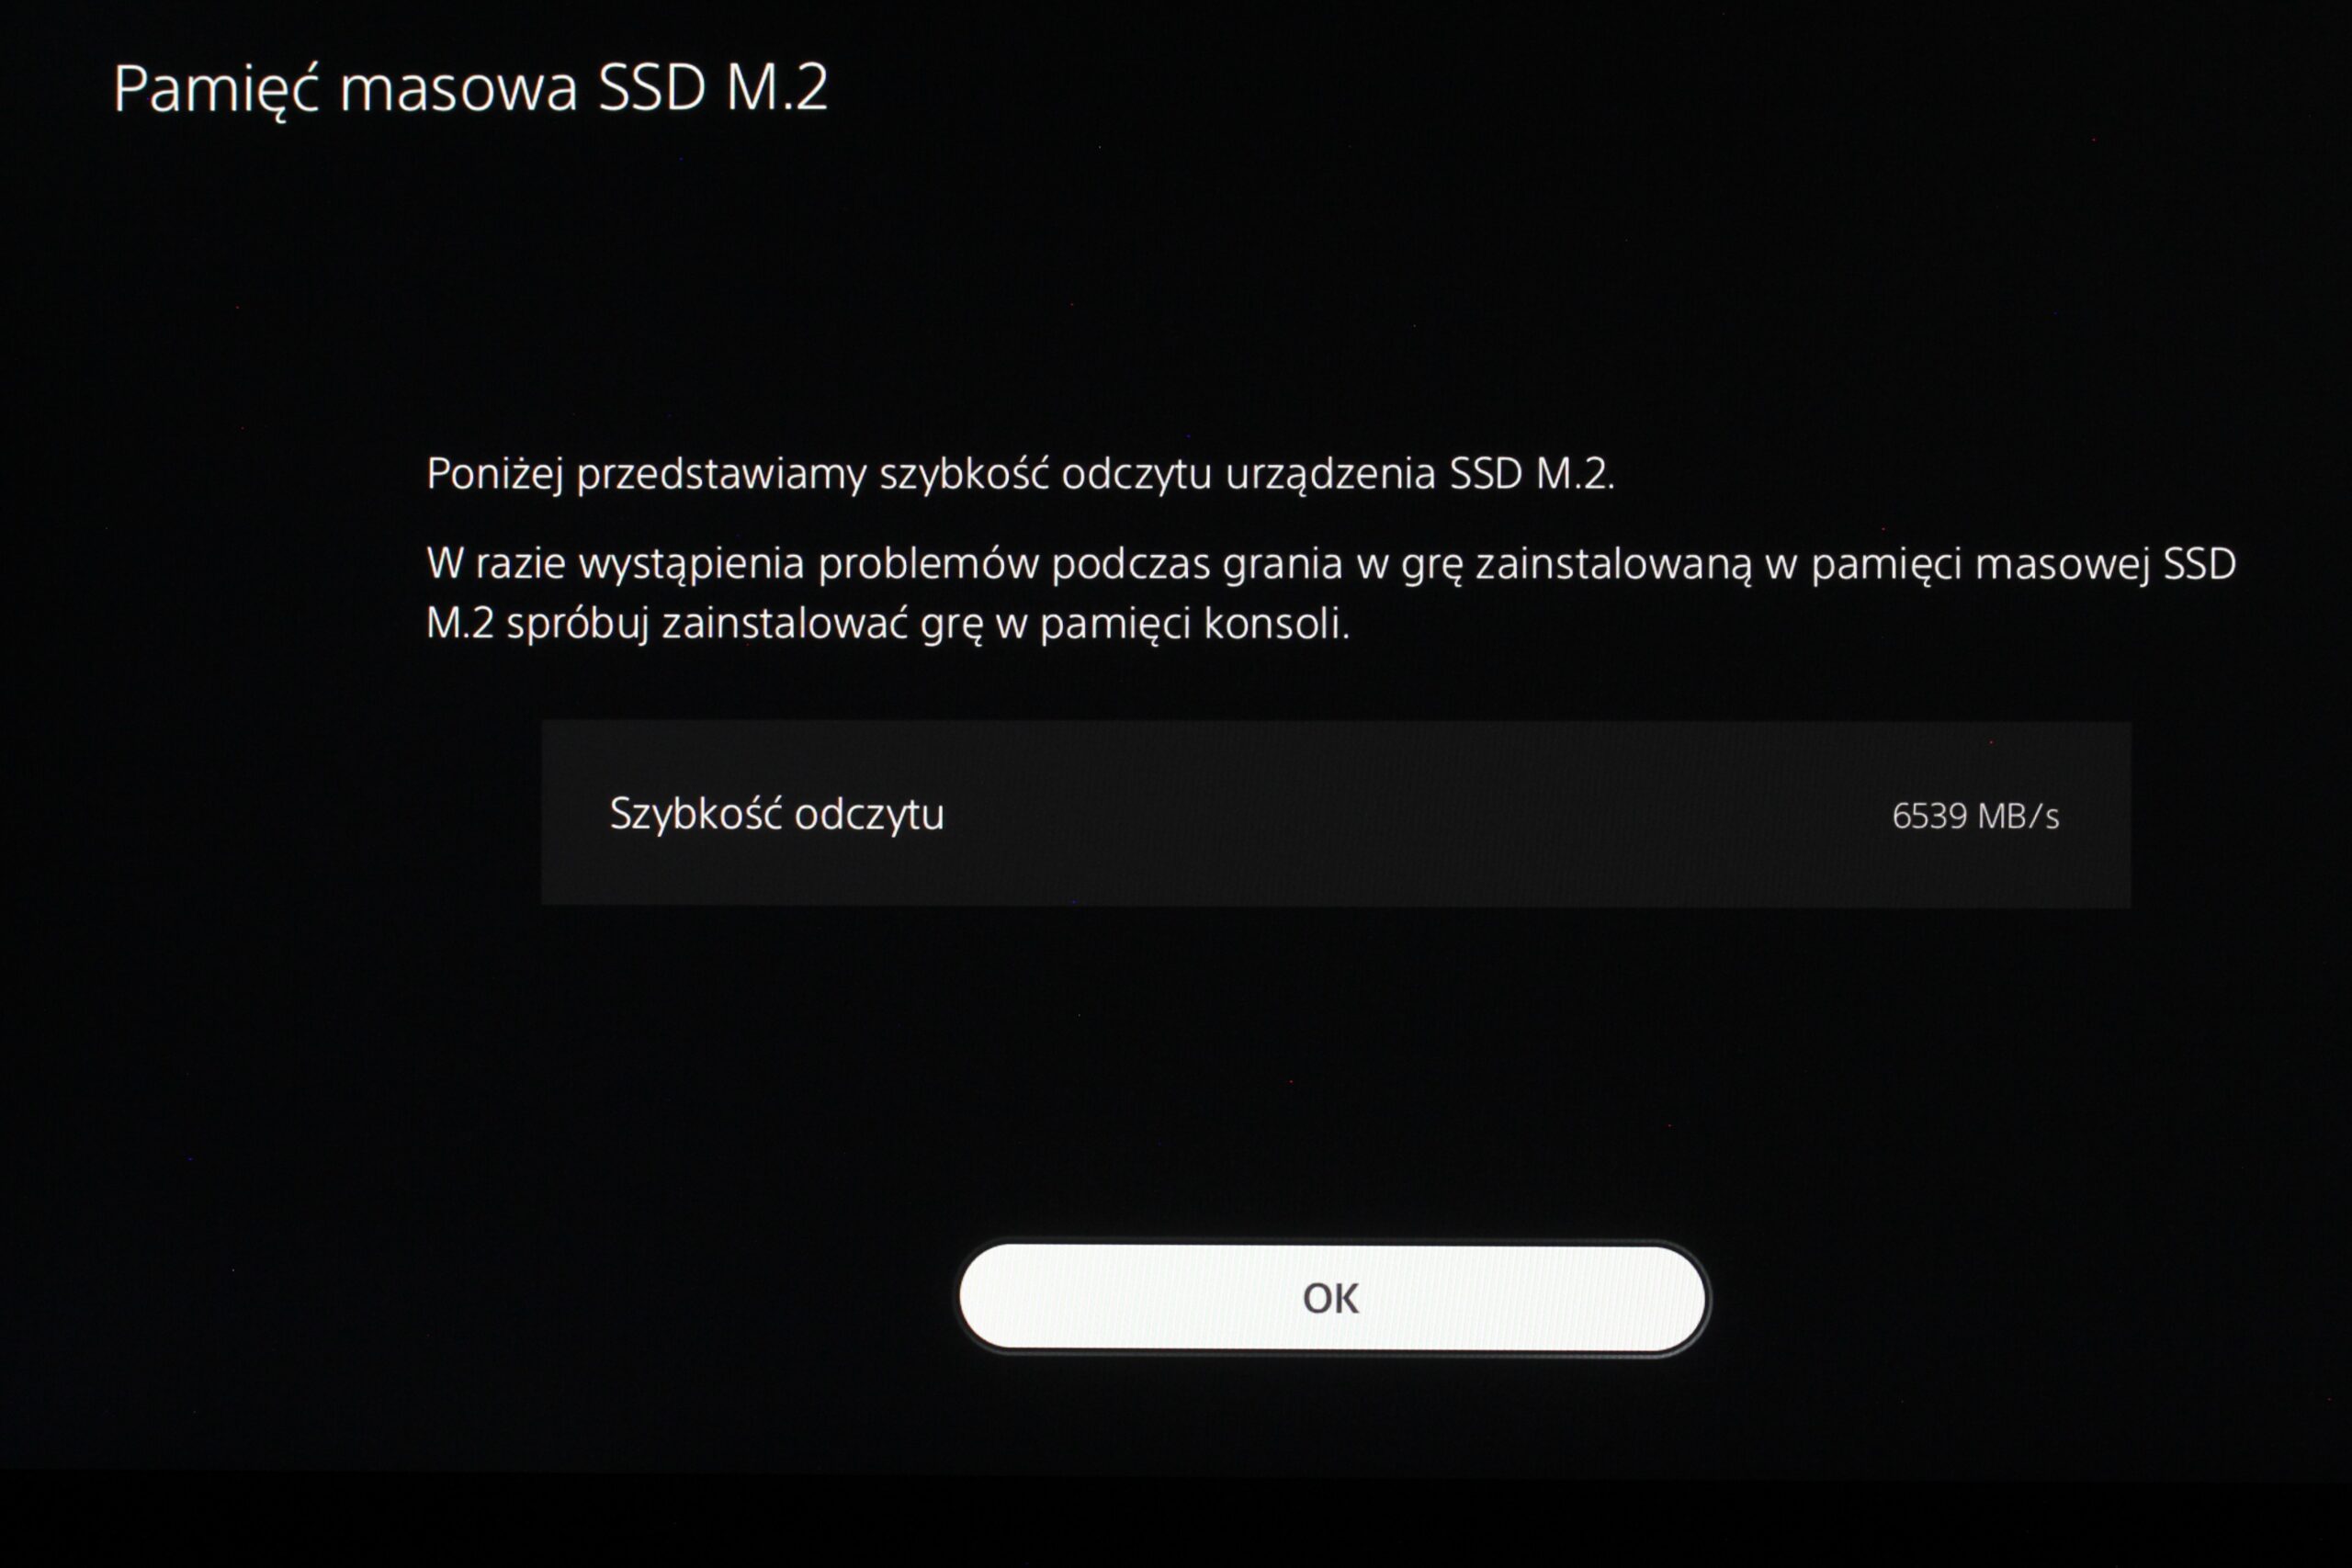
Next you will see a message about the measured read speed of the drive, which, using the IRDM PRO SLIM as an example, is over 6500 MB/s. We would like to remind you that the PlayStation™ 5 console requires a disk supporting speeds of at least 5500 MB/s. After clicking “OK” you will go to the final summary.
At this stage, the console and the new drive are fully operational, and all that’s left for you to do is fill the hardware with your favorite titles!
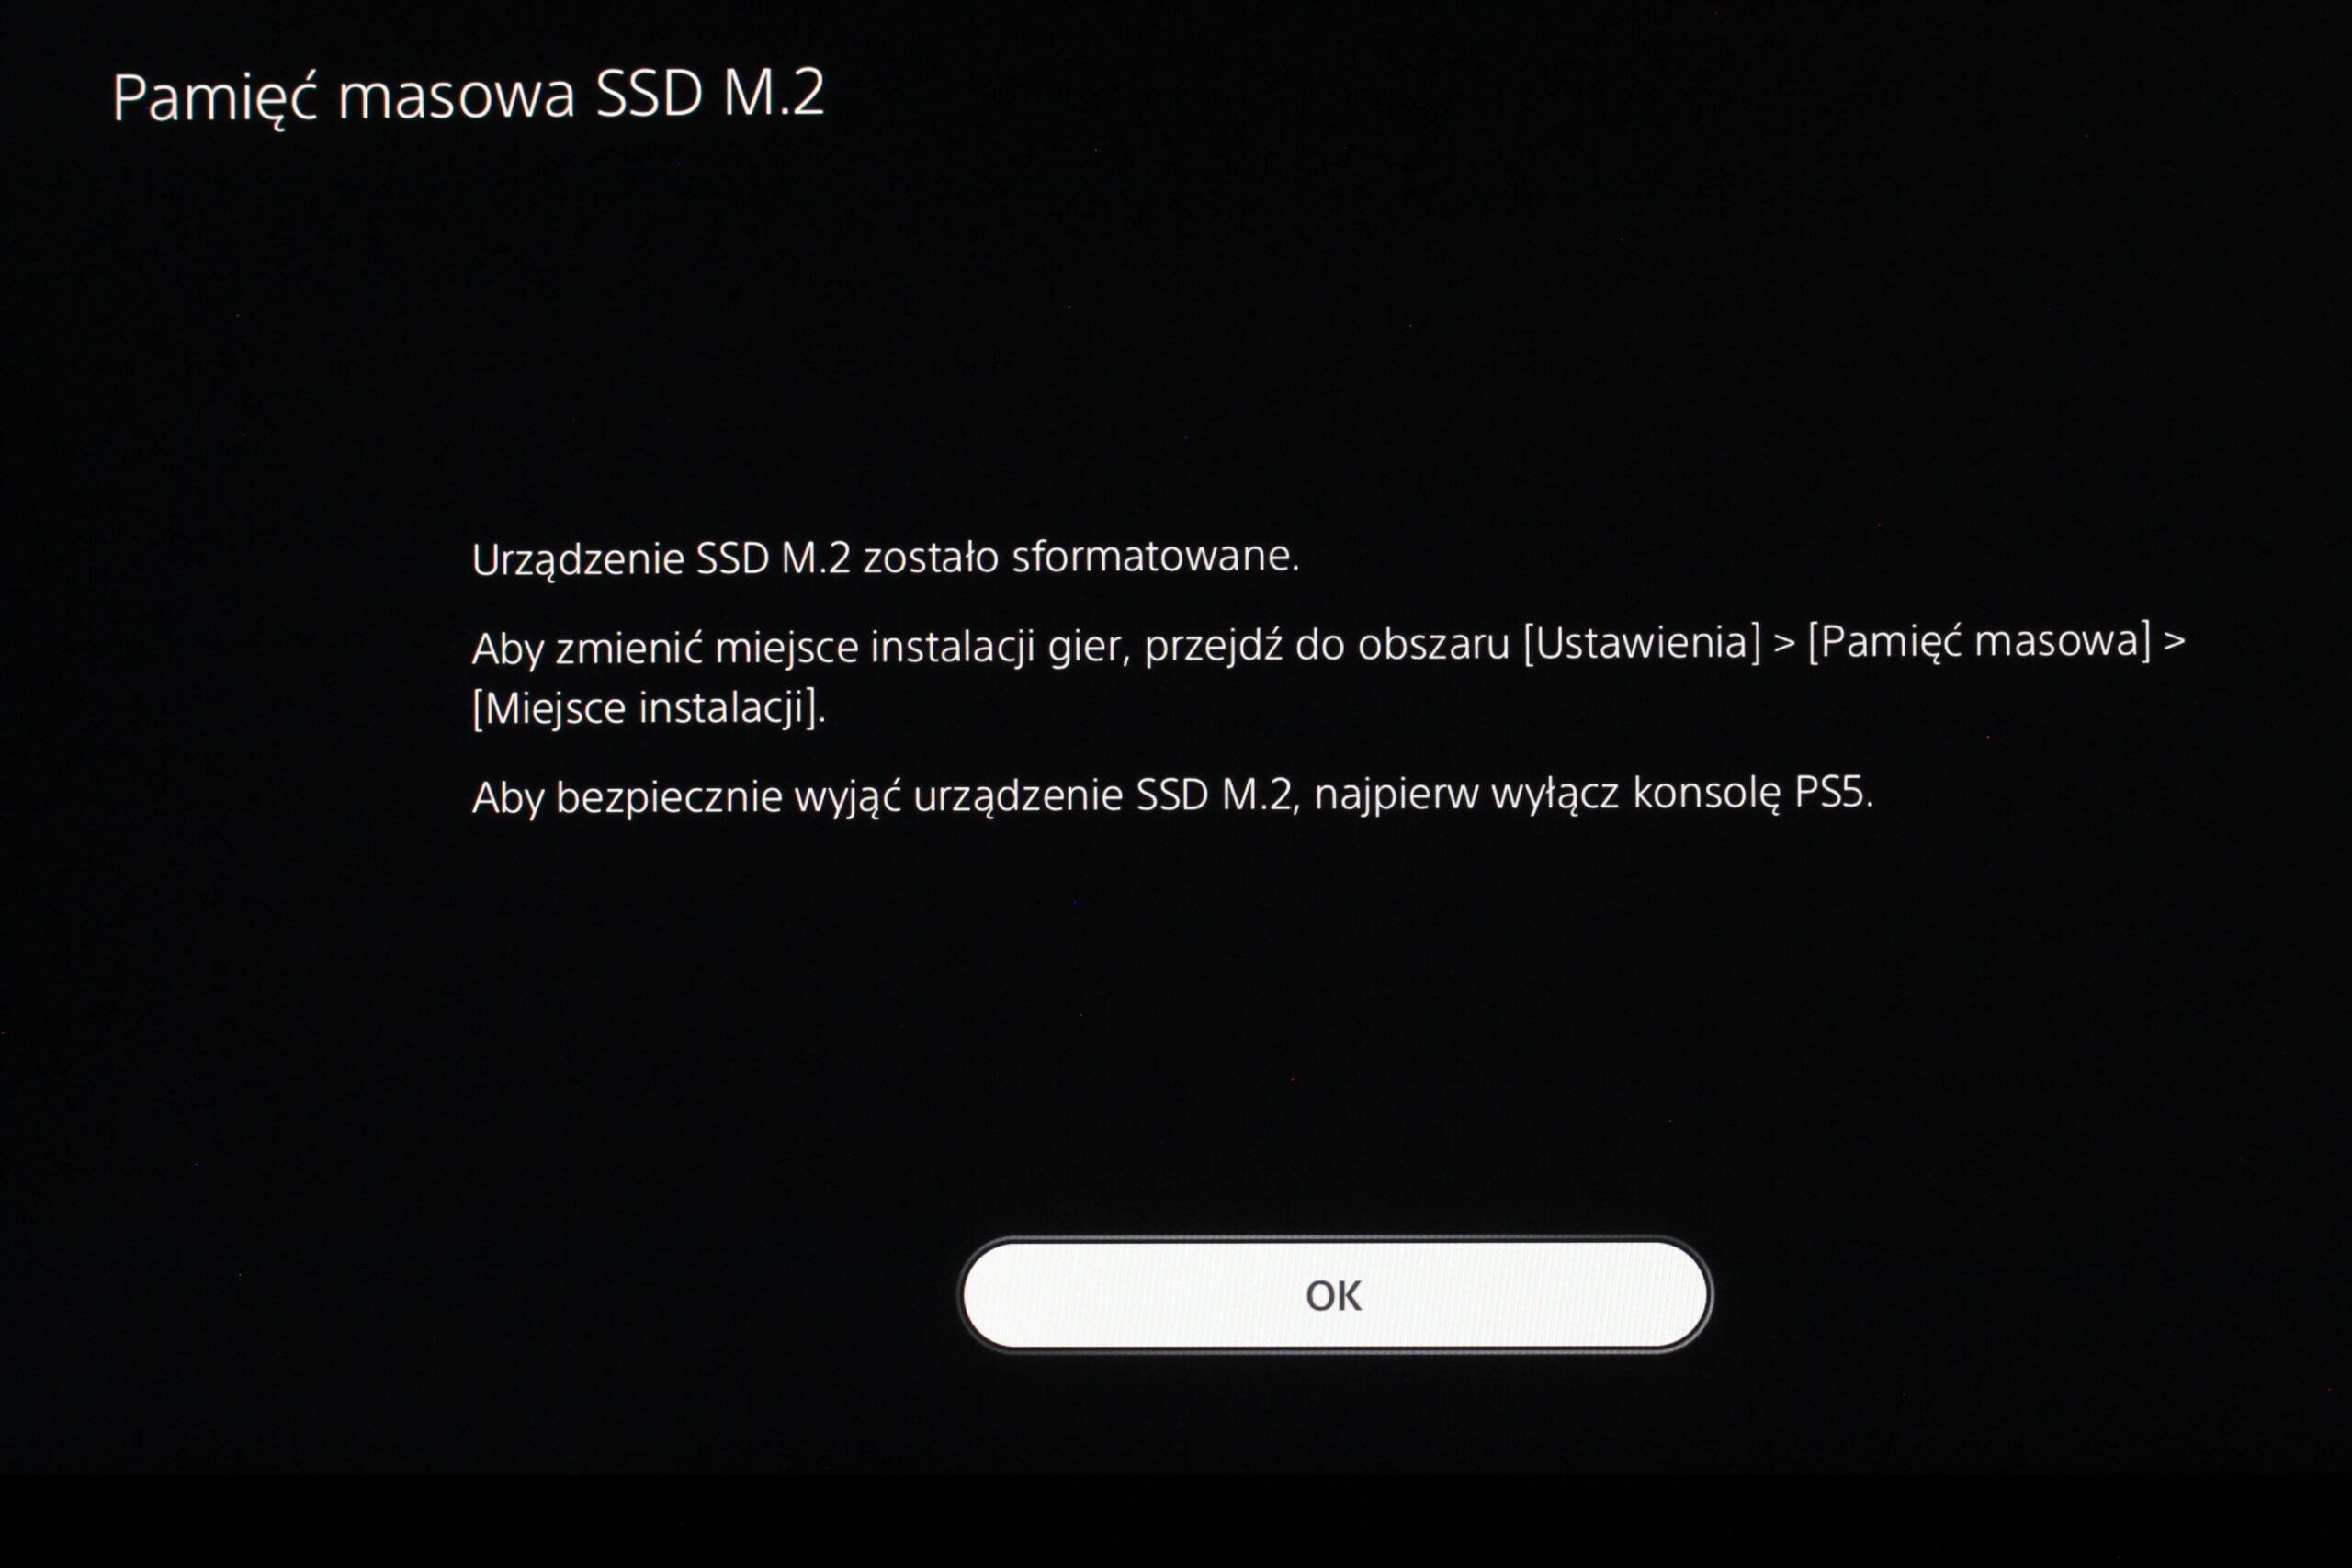
Remember that you can change the installation location of your games at any time under
Settings -> Storage -> Installation Location.
Summary
A console that has been prepared and configured according to our guide is fully operational. The built-in disk will not accommodate a large number of AAA titles, so it’s worth expanding the hardware’s disk space so you don’t have to worry about a lack of space for new titles that take up more and more GigaBytes of disk!
If you are looking for a drive for your PlayStation™ 5 console, we encourage you to take a look at our offer HERE.
To learn more about GOODRAM and IRDM products, please visit our WEBSITE.
If you have any questions, feel free to direct them to marketing@goodram.com or via the Facebook platform – GOODRAM/IRDM.
