How to create a RAID with an SSD
14 September 2023Latest modification: 14 September 2023
RAID (Redundant Array of Independent Disks) is a technology that allows multiple disks to be combined into a single logical partition. The use of a disk array improves performance, security or consists of both features at the same time. It all depends on the type of RAID you use. In this material we will tell you how to do it!
Various disk arrays are known. We have described the most popular ones, that is, such as RAID0 and RAID1, in the material you can find HERE.
To create a RAID in your computer you will need at least two drives, preferably with identical parameters and the same capacity. This is very important, because the use of two disks with different capacities and read/write speeds will cause a bottleneck phenomenon. Then the entire disk array will operate with the parameters of the slowest and smallest disk.
In addition to the two drives, you also need a motherboard with a built-in disk array controller so that there is a possibility of RAID configuration. Most modern motherboards have such a controller on board. However, if you have a motherboard of older design that does not have one, you will need an external disk bay with a built-in controller.
To create a RAID, follow these steps:
- Start by checking if your motherboard supports the RAID function. Make sure that the board you have has a built-in controller. Refer to the documentation that came with your motherboard for instructions and details.
- Connect the drives to the appropriate SATA or M.2 ports on the motherboard.
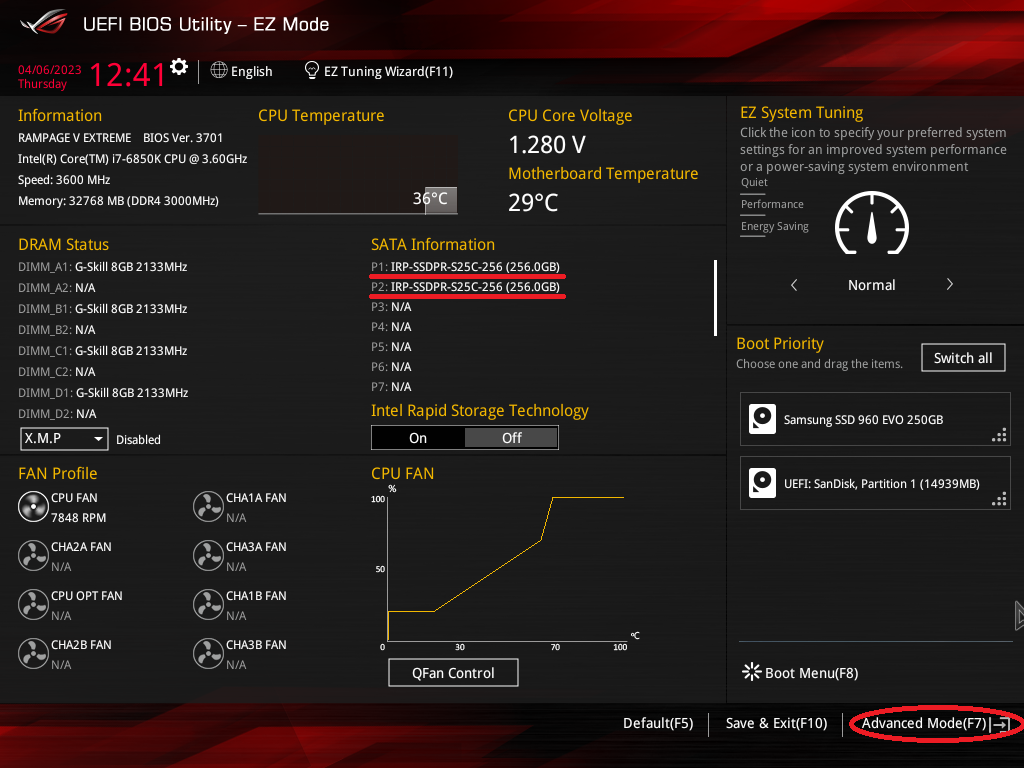
- Boot the computer and enter BIOS/UEFI. To do this, most often you need to press F2, F10, F12 or DEL right after the motherboard manufacturer’s logo appears before the P.O.S.T. test. The combination of appropriate keys depends on the manufacturer and model of the board. A particular key often appears on the screen for a short moment. In UEFI, make sure the drives are installed correctly.

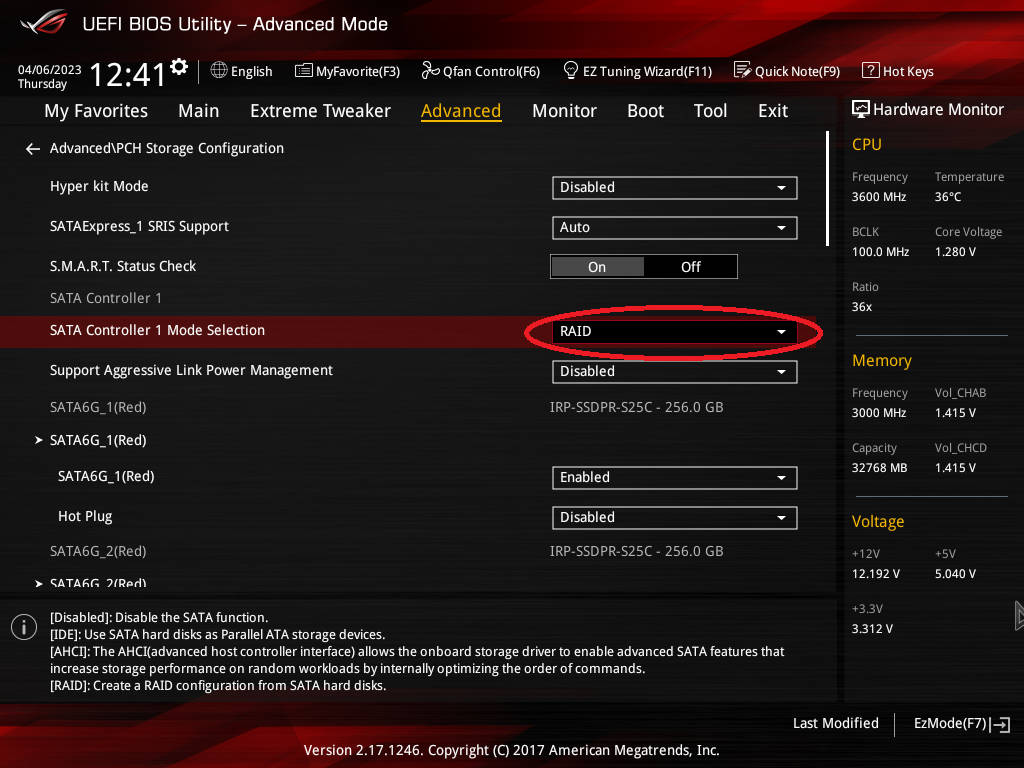
- In BIOS/UEFI, you need to find the section on SATA/RAID configuration. The name of this category may vary depending on the motherboard manufacturer. Make sure you have enabled RAID support.

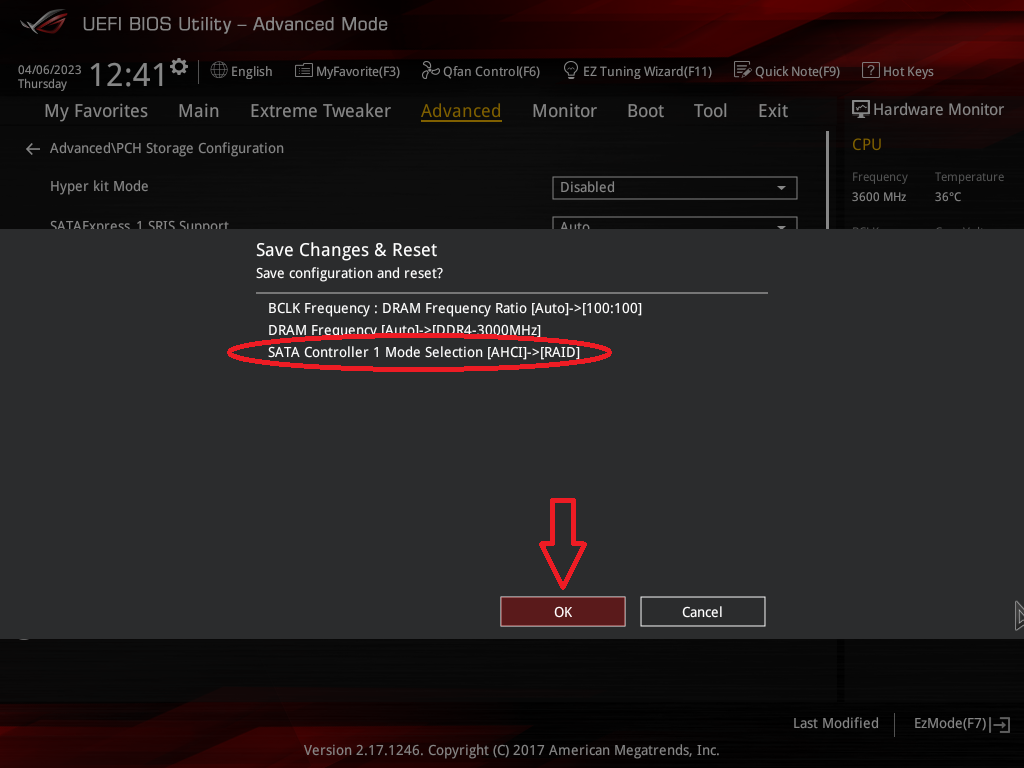
- Then restart the computer, saving the changed settings in BIOS/UEFI.

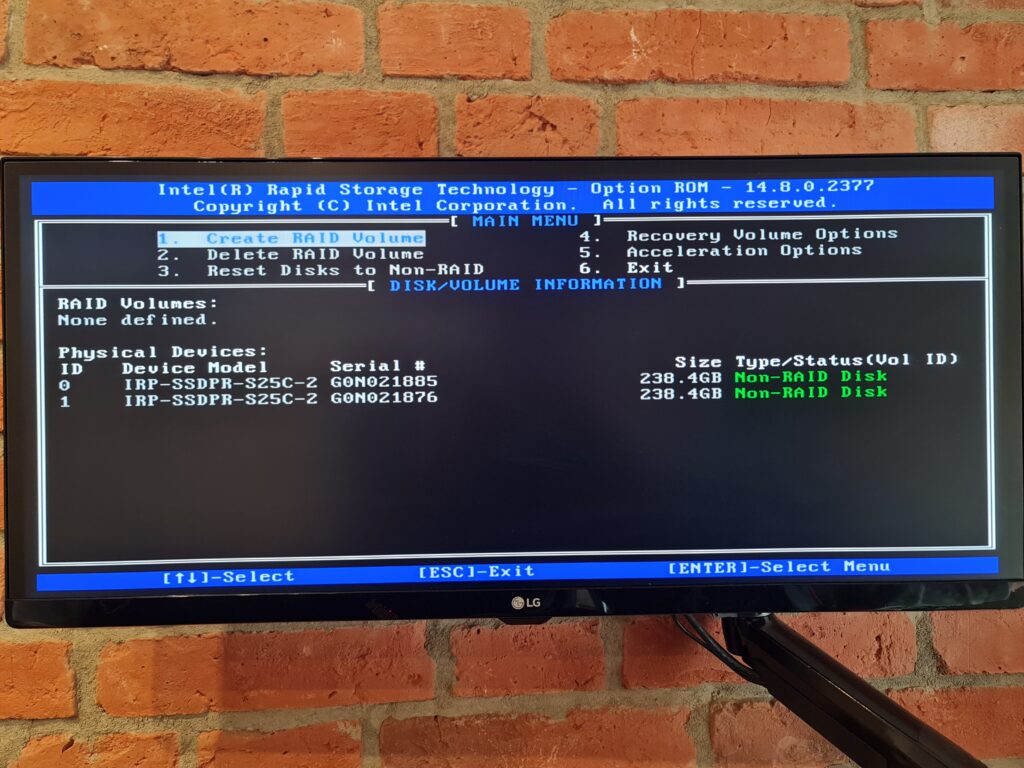
- If everything has been done correctly so far, the configuration wizard for the disk array, which is often called “Intel Rapid Storage Technology” or “RAID Configuration Utility,” should appear after a reboot. On some motherboard models, it is necessary to manually invoke the aforementioned wizard.

- In the RAID configuration tool, select the option to create a new disk array.
- Select a RAID type (e.g., RAID0 for performance or RAID1 for security), set the size of the disk array, and give it a name that will later be visible in the operating system.
- After setting all the most important RAID parameters, save the changes and exit the configuration tool.
- Continue with normal system startup. The system should recognize the newly created disk array as a single disk.
Once all the steps have been completed correctly, the disk array is ready for operation. When you plan to install the system on the RAID – you still face the process of installing the operating system. Don’t forget the drivers, which are sometimes necessary for additional installation during the system installation, otherwise the disk array may not be recognized in the operating system installation wizard.
Keep in mind that the process of creating a RAID may vary depending on the manufacturer and model of the motherboard, and in some cases on the type and version of the operating system. It’s always a good idea to have access to the motherboard’s manual, where we can find help when we’re unsure of a particular configuration step.
Knowing an additional way to use SSDs, we encourage you to check out our range of drives on our Goodram website.
If you have questions, feel free to direct them to marketing@goodram.com or via the Facebook platform – Goodram/IRDM.

